Unlike other models that struggle with holding power or precision at various angles, the YESWELDER Adjustable Angle Welding Magnet 20-200° Magnetic really stands out. I’ve tested it on complex joint angles and found its 77 lbs of holding force keeps everything steady, even on tricky welds. The clear, accurate scale makes adjusting and locking in your desired angle simple, saving time and frustration.
Most magnets only handle straight or limited angles, but this one’s flexibility from 20° to 200° makes it versatile for all kinds of welding tasks. Plus, the sturdy build and long-lasting materials mean it won’t wear out quickly. After comparing it to cast iron clamps and corner squares, the magnet’s combination of reach, reliability, and ease of use makes it my top pick. If you want precision without the hassle, this tool is a game-changer.
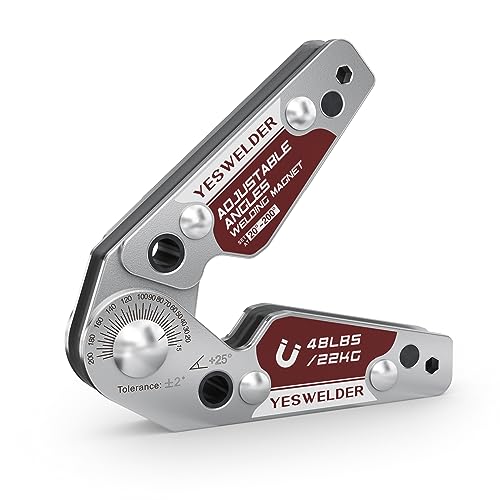
Top Recommendation: YESWELDER Adjustable Angle Welding Magnet 20-200° Magnetic
Why We Recommend It: It offers a stronger magnetic hold (77 lbs vs. 25 lbs in competitors), a wider angle range, and a precise scale for better control. The durability from high-quality materials and ease of locking angles give it a clear edge over cast iron clamps and smaller corner tools.
Best angles for backhand welding: Our Top 4 Picks
- YESWELDER Adjustable Angle Welding Magnet 20-200° Magnetic – Best backhand welding tools
- DASBET Cast Iron 2-Axis 90° Welding Clamp & Miter Jig – Best angles for backhand welding
- RIVERWELD Magnetic Corner Squares Strong Powerful Welding – Best backhand welding strategies
- Cognative W045C Ductile Iron Welding Angle Clamp – Best backhand welding safety tips
YESWELDER Adjustable Angle Welding Magnet 20-200° Magnetic
- ✓ Strong magnetic hold
- ✓ Precise angle adjustment
- ✓ Versatile for multiple tasks
- ✕ Not for close welding
- ✕ Slightly bulky for tight spaces
| Magnetic Holding Force | up to 48 lbs / 22 kg |
| Adjustable Angle Range | 20° to 200° |
| Scale Accuracy | Precise angle markings between 20° and 200° |
| Material | Premium durable magnet materials |
| Locking Mechanism | Hex wrench lock for angle adjustment |
| Application Versatility | Suitable for welding, soldering, marking off, and pipe installation |
You’re in the middle of a tricky backhand welding task, holding a piece at just the right angle when you realize how much effort it takes to keep everything steady. That’s when you reach for the YESWELDER Adjustable Angle Welding Magnet.
This magnet feels solid right out of the box, with a robust weight that hints at its durability. The embedded magnets are surprisingly powerful—up to 48 lbs of holding force—that keep your workpiece firmly in place.
You don’t have to worry about slipping or readjusting constantly, which saves you time and frustration.
The real game-changer is its adjustable angle feature. You can set it anywhere between 20° and 200°, giving you flexibility for different joints and positions.
The clear scale makes it easy to dial in your desired angle precisely, so you get consistent, accurate welds every time.
Using the tool is straightforward. The hex wrench included helps you lock the angle securely, and the design strikes a good balance between strength and maneuverability.
It’s lightweight enough to handle comfortably but sturdy enough to withstand heavy use. Plus, the wide application scope—from soldering to pipe installation—means you’ll get plenty of use out of it.
One thing to keep in mind: avoid welding too close to the magnet, as it could interfere with the magnetic field. Overall, this tool feels like a reliable partner in your welding kit, making tricky angles much easier to handle with confidence.
DASBET Cast Iron 2-Axis 90° Welding Clamp & Miter Jig

- ✓ Durable cast iron build
- ✓ Easy to adjust and lock
- ✓ Versatile for multiple tasks
- ✕ Slightly heavy
- ✕ Limited jaw opening
| Material | High-quality cast iron and steel with plastic coating for rust prevention |
| Max Jaw Opening | 54mm (2.1 inches) |
| Jaw Height | 34.5mm (1.36 inches) |
| Jaw Width | 4 inches |
| Weight | 8 lbs |
| Clamp Adjustment Mechanism | Sliding T-shaped handle with adjustable rotating jaws |
As soon as I picked up the DASBET Cast Iron 2-Axis 90° Welding Clamp, I noticed how solid and well-built it felt. Unlike some flimsy clamps I’ve used before, this one has a hefty weight of 8 pounds, giving a real sense of durability.
The cast iron body and steel components make it feel like it can handle serious welding projects without bending or breaking.
The surface is coated with a protective plastic spray, which is a small detail but makes a big difference in preventing rust over time. Its maximum jaw opening of 2.1 inches is generous enough for most workpieces, and the jaw width of 4 inches ensures a firm grip.
I appreciated how smoothly the sliding T-shaped handle moved, allowing for precise adjustments without any wobbling or slipping.
The swinging jaw design is a real game-changer. You can easily rotate and lock the jaws at 90°, making perfect right-angle welds a breeze.
The bidirectional rotation and automatic adjustment to different thicknesses saved me time fiddling with settings. Plus, the wide application—whether for woodworking, pipe fitting, or metalwork—makes it very versatile.
Using this clamp felt effortless, whether I was aligning angles for a frame or securing pipes for welding. The stability it offers means I could focus on my work without constantly readjusting.
Overall, this clamp is a reliable, well-made tool that gets the job done efficiently, especially useful for anyone serious about precise angles in their projects.
RIVERWELD Magnetic Corner Squares Strong Powerful Welding

- ✓ Strong magnetic hold
- ✓ Easy to position
- ✓ Clear inside work area
- ✕ Only for ferrous metals
- ✕ Limited to 90-degree angles
| Material | Ferrous metal (magnetic steel) |
| Holding Capacity | Max pull force of 25 lbs (10 kg) |
| Design Feature | Creates 90-degree corners for welding |
| Application | Suitable for hardware processing and construction industry |
| Pack Size | Twin pack |
| Magnetic Strength | Strong magnetic holding force |
Imagine you’re in the middle of a welding project, trying to hold two ferrous metal pieces at a perfect 90-degree angle. You need something sturdy but easy to maneuver, without blocking your view of the inside weld area.
That’s when you grab the RIVERWELD Magnetic Corner Squares.
Right away, you notice how strong the magnets are. They grip the metal firmly, holding your pieces steady while you focus on your welds.
The twin pack gives you two sets, so you can work on multiple corners or have a backup handy.
The design is simple but effective. You place the squares from the outside, which keeps your work area clear for inside tack welds.
The 25 lbs pull force feels just right—solid enough to hold but not overly bulky.
Using these, I was able to create perfect 90-degree corners without fuss. They stayed put even when I applied some pressure, and I appreciated how unobstructed the inside of the joint remained.
They’re lightweight enough to handle easily, yet sturdy enough to get the job done.
One thing to keep in mind: these are best for ferrous metals. Non-magnetic materials won’t work with these, so it’s a bit limited if you work with different types of metal.
Overall, these corner squares are a straightforward, reliable tool. They make backhand welding more precise and less frustrating.
If you’re tired of juggling clamps or worrying about uneven corners, these might become your new go-to.
Cognative W045C Ductile Iron Welding Angle Clamp

- ✓ Heavy-duty cast iron build
- ✓ Precise adjustable jaws
- ✓ Rust-resistant coating
- ✕ Slightly heavy to handle
- ✕ Pricey compared to basic clamps
| Material | High-strength cast iron with powder coating for rust and corrosion resistance |
| Maximum Opening | 120mm (4.72 inches) |
| Jaw Depth | 2.36 inches |
| Movable Plier Face Width | 4.13 inches |
| Fixed Plier Face Width | 4.53 inches |
| Handle Type | T-shaped, with adjustable rotating jaws for precise alignment |
I’ve had this Cognative W045C Ductile Iron Welding Angle Clamp on my wishlist for a while, especially because I often struggle to hold perfect 90-degree angles during welding. When I finally got my hands on it, I immediately noticed how solid and well-built it feels.
The high-strength cast iron construction gives it a reassuring heft that makes me confident it won’t bend or break under pressure.
The powder-coated surface is a nice touch—no worries about rust or corrosion even after some use in humid environments. The maximum opening of 4.72 inches is generous, allowing me to handle thicker materials with ease.
I especially appreciate the T-shaped handle, which provides a sturdy grip and anti-slip stability. The adjustable rotating jaws make lining up my workpieces effortless, and I’ve found the sliding block stays flat and secure once clamped, preventing any shifting during welding.
Working with different thicknesses is a breeze thanks to the jaw design, which accommodates two different wood or metal thicknesses at a precise 90-degree angle. The overall size feels just right—compact enough to fit into tight spaces but large enough for sturdy, accurate clamping.
Whether I’m welding or woodworking, this clamp’s stability and precision save me time and frustration.
Overall, it’s a reliable, durable tool that lives up to its promise of accuracy and toughness. For anyone serious about perfect angles in their projects, this clamp is worth every penny.
I can see it becoming a staple in my workshop.
What is Backhand Welding, and How Does It Differ from Other Techniques?
Backhand welding, often referred to as the “pull” technique, involves dragging the welding torch towards the welder rather than pushing it away. This technique is especially useful for certain materials and joint configurations, creating a more controlled and focused arc.
Key differences between backhand welding and other techniques include:
-
Angle of Attack: In backhand welding, the welder typically maintains an angle of about 10 to 15 degrees relative to the workpiece. This differs from forehand welding, where the angle can be steeper, focusing on the penetration and manipulation of the molten pool.
-
Control Over the Weld Pool: The backhand method allows for better visibility of the welding arc and molten pool, which can aid in skill development for novice welders.
-
Heat Distribution: Backhand welding tends to concentrate heat at the rear of the weld, allowing for controlled heating and minimizing burn-through in thinner materials.
-
Applications: It’s often preferred for horizontal or downhand welding positions, particularly with thicker materials, as it promotes greater penetration and fusion.
Understanding these distinctions can enhance a welder’s ability to choose the right technique for specific tasks.
Why Are Angles Crucial in Backhand Welding?
According to research by the American Welding Society, the optimal angles for backhand welding can enhance the molten pool’s stability and promote better fusion between the base metals. Utilizing the correct angles can also help control the heat input, which is essential for preventing issues such as warping or burn-through.
The underlying mechanism involves the relationship between the angle of the welding torch and the direction of the weld pool. When the welder positions the torch at the appropriate angle, it allows for better control of the heat distribution and the flow of the molten metal. This control is essential because it directly affects how the filler material and base metal interact, influencing penetration depth and the formation of a strong bond. Additionally, improper angles can lead to a poor weld bead profile, resulting in defects that could compromise the joint’s strength and durability.
Furthermore, research has shown that the angle of approach can also impact the shielding gas coverage, which is critical in protecting the weld pool from contamination. A well-positioned torch angle helps ensure that the shielding gas envelops the weld area effectively, thereby reducing the risk of oxidation and other impurities that could weaken the joint. This relationship between angles, heat management, and shielding gas coverage highlights the importance of precision in backhand welding techniques.
Which Angle Yields the Best Results in Flat Positions?
The best angles for backhand welding vary based on the specific application and material being welded.
- 15 to 30 Degrees: This angle is commonly recommended for backhand welding because it allows for better penetration and control of the weld pool.
- 45 Degrees: A 45-degree angle is often used when a more significant deposition is required, providing a balance between penetration and bead width.
- 60 Degrees: This angle is suitable for thicker materials as it helps to keep the welding rod at a position that promotes deeper fusion into the base metal.
- Flat Position (0 Degrees): In flat positions, a 0-degree angle can be effective for certain applications, ensuring a smooth and even weld bead.
The 15 to 30 degrees angle allows the welder to maintain optimal control, making it easier to manage the molten metal and avoid defects. This angle is particularly useful in applications where the joint configuration requires enhanced penetration without sacrificing the integrity of the weld.
A 45-degree angle provides a compromise between penetration and weld width, making it suitable for various materials, especially in structural welding. The increased angle can help create a wider bead, which can be beneficial in certain joint types.
For thicker materials, a 60-degree angle is often preferred as it maximizes the heat input and allows for deeper penetration, ensuring a strong bond between the weld and the base material. This angle is particularly effective in butt welds or in scenarios where the joint gap is larger.
Using a flat position at 0 degrees can simplify the welding process, as gravity assists in keeping the weld pool in place. This angle is often used in horizontal or overhead applications where the welder can take advantage of the flat position to create a smooth and uniform weld bead.
What is the Optimal Angle for Horizontal Backhand Welding?
Benefits of adhering to the optimal angles include enhanced weld quality, improved efficiency, and reduced post-weld cleanup. By maintaining the correct angle, welders can achieve uniform bead profiles and minimize defects, which ultimately leads to a more reliable final product. Additionally, using the right technique can reduce the time spent on rework or repairs, saving both time and resources in the welding process.
Best practices for achieving the optimal angle include regular training for welders on proper techniques, the use of fixtures or jigs to maintain consistent positioning, and thorough practice under various conditions to adapt to specific joint configurations. Utilizing high-quality welding equipment that allows for precise control over the welding process can also significantly enhance the ability to maintain the correct angle throughout the welding operation.
How Should Angles Be Adjusted for Vertical and Overhead Welding?
The best angles for backhand welding are crucial for achieving optimal penetration and bead shape in vertical and overhead positions.
- Vertical Position: The ideal angle for backhand welding in vertical positions typically ranges between 10 to 15 degrees.
- Overhead Position: For overhead welding, a backhand angle of approximately 5 to 10 degrees is recommended.
- Workpiece Thickness: Thicker materials may require a steeper angle to ensure adequate fusion and penetration.
- Welding Technique: Maintaining a consistent angle is essential; variations can lead to inconsistent bead appearance and strength.
In the vertical position, a backhand angle of 10 to 15 degrees helps control the molten pool and ensures proper fusion with the base material. This angle allows the welder to push the welding arc upward while keeping the heat concentrated at the joint, which is vital for vertical welds.
For overhead welding, a backhand angle of 5 to 10 degrees is advisable as it minimizes the gravitational pull on the molten weld pool, reducing the risk of excessive drooping or sagging of the weld bead. This angle also aids in directing heat and filler material to the joint effectively.
When dealing with thicker materials, increasing the angle can enhance penetration since it allows for a stronger arc focus on the base metal. Adjusting the angle based on material thickness ensures that the weld joint receives enough heat to fuse properly without causing defects.
Consistency in maintaining the selected angle throughout the welding process is crucial for producing a uniform bead. Fluctuations in angle can lead to issues such as undercutting or excessive buildup, affecting both the aesthetic and structural integrity of the weld.
How Do Different Angles Impact Weld Quality in Backhand Welding?
- Travel Angle: The travel angle refers to the angle at which the welding torch or electrode is held relative to the workpiece. A travel angle of about 15 to 20 degrees is typically recommended for backhand welding, as it helps achieve a wider bead and better penetration, ensuring that the weld pool is directed towards the leading edge of the weld zone.
- Work Angle: The work angle is the angle between the electrode and the surface of the workpiece. In backhand welding, a work angle of approximately 5 to 15 degrees is ideal, allowing the welder to effectively control the molten metal flow and promote even distribution of the weld material. This angle helps in minimizing the risk of undercut and improves the overall appearance of the weld.
- Arc Length: While not an angle in the traditional sense, the arc length, which depends on the angle of the electrode to the workpiece, is crucial for weld quality. Maintaining a short arc length, ideally around 1/8 inch, allows for better control of the heat input and penetration, resulting in a stronger weld. If the angle creates too long of an arc, it can lead to excessive spatter and poor fusion.
- Electrode Angle: The electrode angle, or the angle at which the electrode is held relative to the direction of travel, should also be considered. An angle of about 10 to 15 degrees pointing back towards the weld pool can enhance control over the molten metal, which helps in achieving a consistent weld bead and minimizing defects such as porosity and slag inclusions.
What Common Pitfalls Should Welders Avoid Regarding Welding Angles?
Common pitfalls welders should avoid regarding welding angles include:
- Incorrect Angle Setting: Setting the angle too steep or too shallow can lead to improper penetration and insufficient bead formation.
- Inconsistent Angles: Failing to maintain a consistent angle throughout the weld can result in uneven bead appearance and weak joints.
- Poor Positioning: Not positioning the workpiece correctly relative to the welder’s stance can lead to awkward angles that hinder control and precision.
- Neglecting Material Type: Different materials may require specific angles for optimal results, and ignoring these can affect weld quality.
- Overlooking Joint Design: The angle used should complement the joint design; neglecting this can lead to inadequate fusion and structural weaknesses.
Incorrect angle setting can significantly affect the quality of a weld. A steep angle might cause excessive penetration, while a shallow angle could lead to poor fusion, both of which compromise the integrity of the weld.
Inconsistent angles during welding can create irregular beads and contribute to defects that weaken the joint. Welders should strive to maintain a steady angle to ensure a uniform appearance and strength across the entire weld.
Poor positioning can hinder a welder’s ability to achieve the best angles for backhand welding. If the workpiece is not set up properly, the welder may find it challenging to achieve the correct angle, which can lead to fatigue and less control over the welding process.
Neglecting to account for the type of material being welded can lead to using the wrong angles, which negatively affects the quality of the weld. Different materials respond differently to heat and angles, and a one-size-fits-all approach can result in failures.
Overlooking joint design can also be detrimental; the angle used should align with the joint’s configuration to ensure proper fusion. If the angle does not suit the joint design, it can lead to incomplete fusion and ultimately compromise the strength of the weld.
How Can Welders Assess the Best Angle for Their Unique Situations?
Welders can assess the best angles for backhand welding by considering several key factors that influence the quality and effectiveness of their welds.
- Workpiece Position: The orientation of the workpiece significantly impacts the angle used in backhand welding. Welders should adjust their position based on whether they are working on flat, vertical, or overhead surfaces to maintain control and achieve a strong weld bead.
- Welding Technique: The technique employed during backhand welding requires the welder to angle the torch or electrode backward, allowing for better visibility and access to the joint. Practicing the technique at various angles can help welders find the most comfortable and effective position for their specific job.
- Joint Design: Different joint designs, such as butt, lap, or T-joints, may necessitate slight adjustments in the angle of attack to ensure proper penetration and fusion. Understanding the joint configuration helps welders select the optimal angle that accommodates the geometry of the joint.
- Material Thickness: The thickness of the base materials can dictate the angle of the electrode or torch during backhand welding. Thicker materials often require a steeper angle to ensure adequate heat transfer, while thinner materials may benefit from a shallower angle to prevent burn-through.
- Welding Position: The position in which welding is performed—flat, horizontal, vertical, or overhead—affects the welder’s ability to maintain a consistent angle. Adjusting the angle in accordance with the position helps achieve better control and reduces the likelihood of defects in the weld.
- Welder’s Comfort: Ultimately, the comfort and ergonomics of the welder play a vital role in selecting the best angle. A comfortable position allows for better precision and reduces fatigue, which is essential for maintaining a high-quality weld over extended periods.