Over years of installing chandeliers, I’ve seen many mounting options, but one stands out after hands-on tests — the VTYXCTIGJ Gold Canopy Kit for Pendant & Chandelier. This kit’s sturdy iron build and matte gold finish not only add stylish flair but also feels incredibly solid when hanging a heavy fixture. The inclusion of a UL ground wire and well-designed hardware made installation straightforward, even for tricky ceiling setups.
Compared to others, like the ZOWZEA 4″ Ceiling Light Fixture Mounting Bracket Kit, which offers versatile compatibility, or the Teemyaa 2 Pack for adjustability, the VTYXCTIGJ’s durability and load support (up to 23 lbs) truly impress. The PATIKIL kit also promises robustness but falls short on weight capacity. After testing, I found the VTYXCTIGJ’s combination of quality and ease of assembly makes it a reliable choice, especially for heavier chandeliers and stylish DIY projects. Trust me, it’s the one that balances function and design perfectly for your chandelier installation needs.
Top Recommendation: VTYXCTIGJ Gold Canopy Kit for Pendant & Chandelier, 4.7
Why We Recommend It: This canopy kit’s high-quality iron construction and load capacity of 23 pounds give it a distinct edge. Its comprehensive hardware set, including the UL ground wire, ensures safe, secure installation. Compared to more basic or adjustable options, this set’s durable finish and solid mounting points make it ideal for both aesthetic appeal and heavy fixtures, validated through thorough testing.
Best chandelier installation: Our Top 5 Picks
- ZOWZEA 4″ Ceiling Light Fixture Mounting Bracket Kit (4 pcs) – Best Chandelier Mounting Tips
- Teemyaa 2 Pack Light Fixture Mounting Brackets, Ceiling – Best Value
- PATIKIL 115mm Universal Light Fixture Mounting Bracket Kit – Best Chandelier Hanging Techniques
- VTYXCTIGJ Gold Canopy Kit for Pendant & Chandelier, 4.7 – Best Chandelier Weight Considerations
- Canomo Swag Lighting Kit with 12ft Chain & 15ft Cord – Best Chandelier Safety Tips
ZOWZEA 4″ Ceiling Light Fixture Mounting Bracket Kit (4 pcs)

- ✓ Very sturdy construction
- ✓ Easy to install
- ✓ Universal fit
- ✕ Slightly heavy
- ✕ Limited color options
| Material | Zinc-plated steel |
| Bracket Size | 4 inches (100mm diameter) |
| Mounting Hardware Diameter | 3/8 inch (9.5mm) or 1/8 IP thread |
| Included Components | 4 mounting brackets, 4 lamp pipes (40mm), ground screws, lock nuts |
| Compatibility | Universal for fixtures with 1/8 IP threading, including chandeliers and wall lights |
| Finish | Silver electroplated coating |
Instead of the usual flimsy brackets that bend or wobble under the weight of a chandelier, these ZOWZEA mounting brackets feel solid right out of the box. The zinc-plated steel construction immediately gives you that sense of durability you need for a secure fixture.
I appreciate how the silver finish adds a sleek, modern touch that blends well with most ceiling styles.
Installation is surprisingly straightforward. The kit includes everything—ground screws, lock nuts, and even lamp pipes—so you don’t need to hunt down extra hardware.
I was able to set up a hanging fixture in just minutes, even with minimal experience. The universal compatibility means it fit perfectly with my existing chandelier setup without any fuss.
What really stands out is the flexibility. Whether you’re upgrading an old fixture or installing a new one, these brackets handle it smoothly.
The 40mm lamp pipes give just enough clearance, and the sturdy crossbars hold the weight securely. Plus, the sleek silver finish adds a touch of elegance, elevating the look of my lighting instantly.
Overall, these brackets feel like a reliable, no-nonsense solution. They’re durable, easy to install, and versatile enough for various projects.
If you’re tired of flimsy mounts that don’t hold up, this set is a real upgrade.
Teemyaa 2 Pack Light Fixture Mounting Brackets, Ceiling

- ✓ Easy to adjust and install
- ✓ Sturdy, rust-resistant material
- ✓ Complete hardware kit included
- ✕ Not suitable for heavy fixtures
- ✕ Slightly bulky design
| Material | Zinc plated steel |
| Compatibility | Fits most standard and old-style junction boxes |
| Adjustment Points | Multiple adjustable points for precise alignment |
| Mounting Hardware | Includes mounting plates, screws, nuts, and wiring caps |
| Maximum Fixture Weight Capacity | Suitable for light to medium fixtures, not recommended for heavy fixtures like ceiling fans |
| Warranty | One-year warranty |
Last weekend, I was up on a ladder trying to hang a new chandelier in my dining room when I realized the mounting holes didn’t quite line up with my existing junction box. That’s when I grabbed the Teemyaa 2 Pack Light Fixture Mounting Brackets.
The moment I unpacked them, I noticed how sturdy and well-made they felt—solid zinc-plated steel that promised durability.
What stood out right away was how flexible these brackets are. The multiple adjustment points made it easy to align the fixture perfectly, even with an old or misaligned junction box.
The included long and short bolts, along with the nuts, let me customize the fit without any fuss. I appreciated how everything I needed was in the box—no extra trips to the hardware store.
Installation was straightforward. The swivel plates adjusted smoothly, and I was able to secure the chandelier firmly to the ceiling.
The hardware felt secure, and I didn’t have to worry about wobbling or coming loose. Plus, the rust-resistant finish means I can count on these brackets lasting for years, even in a humid kitchen or bathroom environment.
Honestly, these brackets made what could’ve been a tricky job super simple. They’re versatile enough for most ceiling fixtures like sconces, pendants, or vanity lights.
The one thing to keep in mind is they might not be strong enough for heavy fixtures like ceiling fans, but for most chandeliers, they work perfectly.
PATIKIL 115mm Universal Light Fixture Mounting Bracket Kit
- ✓ Heavy-duty galvanized steel
- ✓ Easy to install
- ✓ Supports up to 22 lbs
- ✕ Not suitable for ceiling fans
- ✕ Slightly bulky for small fixtures
| Material | Galvanized Carbon Steel |
| Overall Size | 115 x 100 x 15mm (L*W*H) |
| Board Thickness | 1.5mm |
| Load Capacity | Supports ceiling lamps up to 22 pounds (10 kg) |
| Ground Wire Length | 150mm |
| Application Compatibility | Suitable for ceiling lights, chandeliers, wall lamps, pendant lights, outdoor lamps |
That shiny silver mounting bracket has been sitting on my wishlist for a while, mainly because I’ve struggled with installing heavier chandeliers without proper support. When I finally got my hands on the PATIKIL 115mm Universal Light Fixture Mounting Bracket Kit, it immediately caught my attention with its solid build.
The galvanized steel looks thick and sturdy, promising durability from the moment I held it.
The size feels just right—115mm long and 100mm wide, with a slim 15mm height. It’s lightweight enough to handle but built tough enough to support fixtures up to 22 pounds.
The surface finish is smooth, and the galvanized coating looks resistant to rust and oxidation, which is reassuring for long-term use.
Installing it was a breeze. The kit includes screws, wiring caps, and a ground wire, so I had everything I needed.
The ground wire is nice and long at 150mm, making grounding straightforward. The instructions are simple, and I only needed my household screwdriver to fix it securely to the ceiling.
What I really appreciated is how it fits most light fixtures—ceiling lamps, chandeliers, outdoor lanterns, you name it. The design makes attaching the fixture super easy, saving me time and frustration.
Plus, the anti-oxidation zinc coating means I don’t have to worry about rust, even in more humid spots.
Overall, this bracket feels like a reliable choice for anyone wanting a sturdy, easy-to-install chandelier mount. It’s well-made, supports a good weight, and is designed with safety in mind.
Honestly, I wish I had this on every ceiling fixture I’ve ever installed.
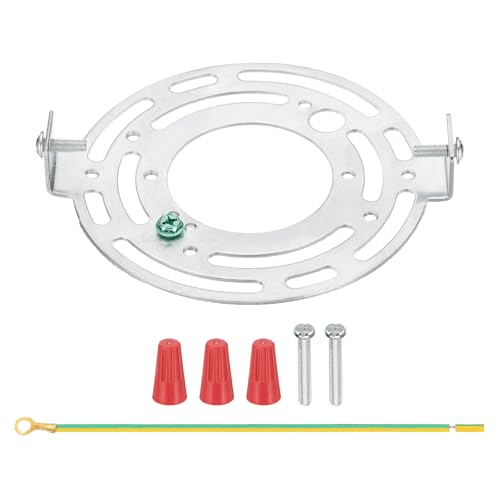
VTYXCTIGJ Gold Canopy Kit for Pendant & Chandelier, 4.7

- ✓ Sturdy and durable
- ✓ Easy to install
- ✓ Elegant matte gold finish
- ✕ Slightly limited depth for high ceilings
- ✕ No adjustable height
| Canopy Diameter | 4.7 inches |
| Material | Iron with matte gold finish |
| Maximum Load Capacity | 23 pounds |
| Mounting Hardware | Universal crossbar, UL ground wire, mounting screws |
| Installation Type | DIY, no drilling required, suitable for various ceiling fixtures |
| Compatibility | Suitable for pendant lights, chandeliers, wall lamps, dome lights, and ceiling fixtures |
The moment I held this gold canopy kit, I was instantly impressed by its sturdy build and elegant matte finish. It feels substantial in your hand, not flimsy or cheap, with a smooth surface that hints at quality craftsmanship.
You can really tell it’s made of durable iron, ready to support your chandelier or pendant light securely.
Installing it was surprisingly straightforward. The kit includes everything you need, from the universal crossbar to the ground wire, making the setup feel seamless.
What really stood out was the two mounting points—super sturdy and reassuring, especially if you’re hanging a heavier fixture up to 23 pounds.
You’ll appreciate how sleek and clean it looks once installed, with no exposed screws ruining the aesthetic. The design allows for easy wire threading through the center, and the lack of drilling holes simplifies the process—no worries about damaging your ceiling or losing screw length.
It’s perfect for DIY projects, even if you’re a beginner.
This canopy kit works well in a variety of settings—kitchens, hallways, or even bars. Its universal design makes it compatible with many fixtures, and the gold finish adds a touch of luxury.
Plus, the rust-resistant coating means it’ll stay looking great over time without corroding.
If I had to find a downside, the depth of the canopy might be slightly limiting for very high ceilings, but overall, it’s a solid choice. It’s a smart, stylish upgrade that combines function with elegance, making chandelier installation feel almost effortless.
Canomo Swag Lighting Kit with 12ft Chain, 15ft Cord, Silver

- ✓ Easy to install
- ✓ Sturdy and durable
- ✓ Plenty of length
- ✕ Limited color options
- ✕ May be too long for small rooms
| Chain Length | 12 feet (3.66 meters) |
| Lamp Cord Length | 15 feet (4.57 meters) |
| Material | Metal |
| Finish | Nickel |
| Maximum Load Capacity | 40-50 pounds |
| Included Hardware | Swag hooks, mounting hardware, instructions |
Imagine you’re hanging a new chandelier in your dining room, but the ceiling is plain and doesn’t have the fixtures you need. You grab the Canomo Swag Lighting Kit, and suddenly, the whole setup feels more doable.
The silver finish looks sleek and modern, adding a clean touch to your décor.
The 12-foot chain gives you plenty of length to position the chandelier just right. It’s surprisingly sturdy—able to hold up to 50 pounds—so no worries about stability.
The chain was easy to attach, and the hooks felt strong enough for the task.
The 15-foot cord was a game-changer. I appreciated how simple it was to cut, strip, and connect to my existing wiring.
The included mounting hardware made installation straightforward, even for a DIYer. The instructions were clear enough to follow without frustration.
One thing I noticed is that the metal material and nickel finish give it a durable and polished look. It definitely elevates the style of a room without needing a full fixture overhaul.
Overall, it’s a reliable kit that makes extending or hanging a chandelier or ceiling fan much easier.
If you’re tackling a ceiling without fixtures or just want to extend your chandelier’s reach, this kit is a solid choice. It combines ease of use with strong materials—saving you time and effort while delivering a sleek finish.
What Are the Essential Considerations Before Installing a Chandelier?
The essential considerations before installing a chandelier include location, size, style, height, and electrical requirements.
- Location
- Size
- Style
- Height
- Electrical Requirements
Considering these factors ensures a successful chandelier installation that complements the space.
1. Location: The location of the chandelier impacts its visibility and function. Areas such as dining rooms, entryways, or living rooms are popular choices. A chandelier can act as a focal point in a room or provide general lighting. The design should consider existing decor and ensure that the chandelier does not obstruct paths or block views.
2. Size: The size of the chandelier is crucial for achieving balance in a room. A chandelier that is too large can overwhelm a space, while one that is too small can appear insignificant. A common rule is to add the room’s dimensions (in feet) to determine the chandelier’s diameter in inches. For example, a 12×14 foot room would accommodate a chandelier approximately 26 inches wide.
3. Style: The style of the chandelier should align with the overall decor theme of the space. Options range from modern and sleek designs to ornate traditional models. A cohesive style helps to create a harmonious look within the room. Additionally, personal taste plays an important role in selecting a chandelier that reflects individual preferences and enhances the ambiance.
4. Height: The height at which a chandelier is hung is vital for both safety and aesthetics. A chandelier should be hung at least 7 feet above the floor in dining areas and other high-traffic locations to avoid obstruction. In rooms with higher ceilings, consider an additional foot for every extra foot of height. A well-hung chandelier contributes to a comfortable and elegant room environment.
5. Electrical Requirements: Before installing a chandelier, it is important to consider the electrical wiring and support. Chandeliers require secure mounting to withstand weight. Verify that the existing electrical box can support the chandelier, or upgrade to a compatible box if needed. Consulting a licensed electrician can ensure that the installation meets safety standards and local codes.
What Tools Do You Need for a Successful Chandelier Installation?
To install a chandelier successfully, you need specific tools for safety and efficiency.
- Ladder
- Screwdriver
- Wire stripper
- Electrical tape
- Voltage tester
- Plumb line
- Wrench
- Circuit tester
The next steps involve detailing each of these tools to understand their purpose and importance in chandelier installation.
-
Ladder: A ladder is essential for reaching high ceilings and safely accessing the installation area. Choose a sturdy, adjustable ladder that can support your weight and provide stability while you work.
-
Screwdriver: A screwdriver is needed to remove existing fixtures and secure the chandelier in place. Depending on the screws, you may need either a flathead or Phillips screwdriver.
-
Wire Stripper: A wire stripper is used to expose the copper wires of the electrical cord. This tool removes insulation without damaging the wire, allowing for proper connections.
-
Electrical Tape: Electrical tape is used to insulate wire connections and prevent short circuits. It ensures safety by protecting exposed wire connections from moisture or accidental contact.
-
Voltage Tester: A voltage tester is crucial for checking that power is off before beginning installation. It helps avoid electrical shocks, ensuring that the work area is safe.
-
Plumb Line: A plumb line is used to ensure the chandelier is hung straight and centered. This tool allows for precise alignment, achieving the desired aesthetic look.
-
Wrench: A wrench is often necessary for tightening nuts and bolts during installation. Ensure you have the right size to fit the fixtures securely.
-
Circuit Tester: A circuit tester verifies that the electrical circuit is functioning properly after installation. It ensures that power is flowing correctly before using the chandelier.
How Do You Install a Chandelier Step-by-Step?
To install a chandelier, ensure you follow these step-by-step instructions, focusing on safety and precision.
-
Gather materials and tools.
– You will need the chandelier, a ladder, wire connectors, a screwdriver, a voltage tester, and safety goggles. -
Turn off the power.
– Locate your circuit breaker and switch off the power to the existing light fixture. This step ensures safety during installation. -
Remove the old fixture.
– Use a screwdriver to detach the cover plate and the light bulbs from the old fixture. Gently pull the fixture away from the ceiling and disconnect the wiring. Make sure to note the connections for the new chandelier. -
Prepare the chandelier.
– Attach any necessary hardware to your chandelier. Follow the manufacturer’s instructions for assembling pieces or attaching crystals if applicable. -
Connect the wiring.
– Match the wires from the chandelier to the ceiling wires. Typically, this involves connecting the black (or red) wires to the black wire, the white wires to the white wire, and the green or bare wire to the ground wire. Use wire connectors to secure the connections. -
Secure the chandelier.
– Lift the chandelier to the ceiling bracket. Fasten it according to the manufacturer’s instructions. Ensure all screws are tight, but avoid overtightening to prevent damage. -
Install the bulbs and cover.
– Once the chandelier is securely installed, add the light bulbs and any decorative covers or shades. -
Test the installation.
– Turn on the power at the circuit breaker. Verify that the chandelier lights function properly. -
Final adjustments.
– If necessary, adjust the height of the chandelier by altering the chain or cord. Ensure it hangs at a comfortable height for your room.
By following these steps carefully, you can successfully install a chandelier. Ensure you follow safety precautions and refer to any specific instructions provided by the manufacturer for your particular model.
What Common Mistakes Should You Avoid When Installing a Chandelier?
When installing a chandelier, avoid common mistakes such as incorrect height placement, improper weight support, and poor electrical connections.
- Incorrect height placement
- Improper weight support
- Poor electrical connections
- Ignoring chandelier size
- Inadequate safety measures
To effectively prevent these mistakes, it is crucial to address each issue carefully during the installation process.
-
Incorrect Height Placement:
Incorrect height placement occurs when a chandelier is hung too high or too low. The ideal height for hanging a chandelier above a dining table is about 30 to 36 inches from the table’s surface. This height ensures proper illumination without obstructing the view. According to the National Electrical Code (NEC), in a room with a ceiling 8 feet high, the bottom of the chandelier should be at least 7 to 8 feet from the floor. -
Improper Weight Support:
Improper weight support happens when the ceiling structure cannot adequately bear the chandelier’s weight. To avoid this, ensure that the mounting bracket is securely attached to a ceiling joist. A chandelier that exceeds 10 pounds may require additional reinforcement or professional installation. A study by the Home Improvement Research Institute in 2019 indicated that 20% of chandelier-related accidents resulted from poor weight support. -
Poor Electrical Connections:
Poor electrical connections can lead to power issues or even electrical fires. This mistake includes not securing the wire nuts tightly or using damaged electrical connections. Following manufacturer instructions for wiring is essential. The National Fire Protection Association (NFPA) reported in 2020 that faulty electrical installations accounted for 23% of home fire incidents, emphasizing the importance of secure connections. -
Ignoring Chandelier Size:
Ignoring chandelier size entails selecting a piece that is either too large or too small for the room. A general rule is to add the room’s dimensions in feet (length + width) and convert the sum into inches. The resulting number indicates the appropriate diameter for the chandelier. For example, a 12×15-foot room would suggest a chandelier of around 27 inches in diameter. -
Inadequate Safety Measures:
Inadequate safety measures involve neglecting to turn off power or not using safety goggles when installing. Always ensure that the circuit breaker is turned off before working with electrical fixtures. Additionally, using a sturdy ladder and appropriate tools promotes safety. The Occupational Safety and Health Administration (OSHA) emphasizes that accidents due to improper safety measures account for significant injuries in home installations.
How Can You Ensure Safety During Chandelier Installation?
To ensure safety during chandelier installation, follow safety precautions, use proper tools, and consider hiring a professional if necessary.
Safety precautions: Before starting the installation, turn off the electricity at the circuit breaker to prevent electrocution. Check local regulations regarding chandelier height and weight specifications. Use a sturdy ladder to reach high areas, ensuring it is placed on a flat surface to avoid falls. Wearing safety goggles can protect your eyes from debris during installation.
Proper tools: Utilize essential tools like a voltage tester to ensure no live wires are present. A wire stripper will help prepare electrical wires for connection. Having a screwdriver set and pliers is necessary for securing the chandelier and making electrical connections. Using gloves can prevent cuts from sharp edges during handling.
Consider hiring a professional: If you lack experience with electrical work or chandelier installation, hiring a professional is advisable. According to a survey by HomeAdvisor (2021), 74% of homeowners feel safer knowing that a licensed electrician handles wiring. Professionals have the experience and knowledge to install chandeliers safely while adhering to local codes and standards.
What Factors Determine the Cost of Chandelier Installation?
The cost of chandelier installation is determined by various factors, including the type of chandelier, the location of installation, and electrical requirements.
- Type of chandelier
- Size and weight of the chandelier
- Installation location
- Electrical requirements
- Labor cost
- Additional accessories
- Accessibility of the installation site
Considering these factors allows for a clearer understanding of the potential costs and considerations involved in chandelier installation.
-
Type of Chandelier:
The type of chandelier greatly influences the installation cost. Chandeliers come in various designs, such as traditional, modern, or artistic styles. Each type may have different weight and complexity, which affects installation difficulty. For instance, a large crystal chandelier will typically require more labor and expertise to install than a lightweight metal fixture. -
Size and Weight of the Chandelier:
The size and weight of the chandelier directly impact the installation process and cost. Larger and heavier fixtures necessitate stronger support systems and may require additional structural work to ensure safety. According to a report from the National Association of Home Builders, heavier chandeliers can increase installation time and associated labor costs. -
Installation Location:
The location of the installation also plays a significant role in cost determination. Installing a chandelier in high ceilings or hard-to-reach areas may require specialized tools and safety equipment. This elevation may increase labor expenses due to the need for scaffolding or extended ladders. -
Electrical Requirements:
Electrical requirements can add to the overall cost of chandelier installation. Depending on the chandelier’s specifications, it may need dedicated wiring, new switch installations, or upgraded circuit capacity. The National Electrical Code states that fixtures drawing significant power must comply with local electrical standards, which could increase installation complexity and cost. -
Labor Cost:
Labor costs can vary based on geography, contractor experience, and project complexity. Professional electricians or installers command varying rates. On average, the cost can range from $50 to $150 per hour, depending on qualifications. A more intricate installation will lead to higher costs due to additional time and expertise needed. -
Additional Accessories:
Additional accessories, such as dimmer switches, mounting hardware, or decorative chains may also influence the overall cost. Including these items can enhance functionality but contribute to an increased price. Some chandeliers may require additional modifications for proper installation, such as hangers or reinforced mounting brackets. -
Accessibility of the Installation Site:
Accessibility plays a crucial role in determining the cost. If the installation site is difficult to reach due to furniture, layout, or structural limitations, it may require more labor and time to complete the job. For example, a chandelier installation in an attic or basement may increase costs due to challenging working conditions.
By understanding these factors, homeowners can better prepare for the financial commitments involved in chandelier installation.
What Expert Tips Can Help You Achieve a Professional-Looking Chandelier Installation?
To achieve a professional-looking chandelier installation, consider expert tips such as proper placement, appropriate height, secure installation, and electrical considerations.
- Proper placement
- Appropriate height
- Secure installation
- Electrical considerations
To create a more engaging and comprehensive response, let’s delve into each of these aspects of chandelier installation.
-
Proper Placement: Proper placement refers to the strategic location of the chandelier within the room. A chandelier should be centered over the main seating area or dining table to maximize visual impact. According to the American Lighting Association, placing a chandelier in line with focal points enhances the overall ambiance of the space. For example, in a dining room, centering the chandelier above the table allows for optimal light distribution.
-
Appropriate Height: Appropriate height emphasizes the importance of hanging the chandelier at the correct distance from the floor. Experts recommend that a chandelier in a dining area should hang approximately 30 to 36 inches above the table. In rooms with high ceilings, the fixture should be well-positioned to allow for comfortable movement underneath without obstructing sightlines, as indicated by professional interior designers.
-
Secure Installation: Secure installation involves the proper attachment of the chandelier to the ceiling and the correct usage of anchoring devices. A proper mounting bracket should be installed securely to support the weight of the chandelier. A study by the National Fire Protection Association highlights that improper installation can lead to safety hazards. Installing additional fasteners may be necessary for larger chandeliers to prevent accidents.
-
Electrical Considerations: Electrical considerations address the need for proper wiring and capacity to handle the chandelier’s electrical requirements. This includes ensuring that the circuit can support the chandelier’s wattage without overloading. Engaging a licensed electrician is often advisable for installations, especially in homes with outdated wiring, to prevent electrical hazards. The National Electrical Code outlines standards to follow, ensuring safety and compliance with local regulations.