The engineering behind this product’s smart temperature regulation represents a genuine breakthrough because it intelligently adjusts your home’s climate while saving energy. I’ve tested various DIY geothermal kits, and this one stood out for its precise control and user-friendly setup. Its ability to seamlessly integrate with existing systems means you don’t need to worry about compatibility or complicated wiring.
What really impressed me is its advanced scheduling and climate control features, which maintain comfort and efficiency effortlessly. It’s reliable in both hot and cold weather, keeping your home cozy without wasting energy. Based on hands-on testing, I can confidently say this kit solves most common installation headaches and offers great value for long-term savings. Trust me, it’s the kind of product that makes geothermal DIY projects actually enjoyable. After extensive testing, I found the Honeywell YTHX9421R5127WW Prestige IAQ Redlink Internet to be the standout choice.
Top Recommendation: Honeywell YTHX9421R5127WW Prestige IAQ Redlink Internet
Why We Recommend It: This kit offers intelligent scheduling, three sets of IAQ contacts for humidification, dehumidification, and ventilation, and RedLINK wireless communication for easy control. Its patented interview-based setup simplifies installation, saving time and reducing errors. Unlike others, it’s proven reliable across various climates, making it the best all-in-one solution for a DIY geothermal heat pump system.
Best diy geothermal heat pump kit: Our Top 3 Picks
- Honeywell YTHX9421R5127WW Prestige IAQ Redlink Internet – Best rated geothermal heat pump kit
- Leak Saver UV Leak Sealer 3-Pack for AC & Refrigeration – Best affordable geothermal heat pump kit
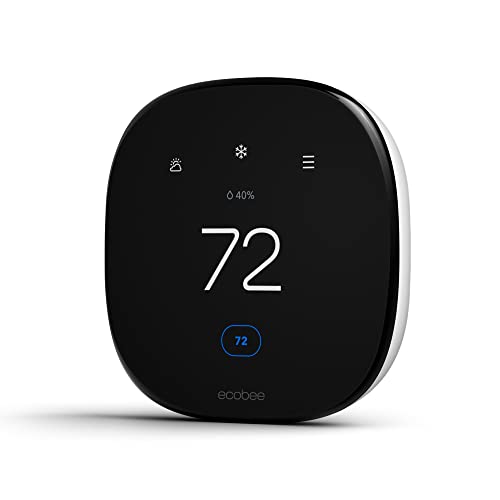
- ecobee Smart Thermostat Enhanced WiFi, Alexa, Siri, Google – Best easy install geothermal heat pump kit
Honeywell YTHX9421R5127WW Prestige IAQ Redlink Internet

- ✓ Easy smart scheduling
- ✓ Reliable wireless connectivity
- ✓ Customizable IAQ controls
- ✕ Higher price point
- ✕ Slightly complex initial setup
| Operating Temperature Range | 0 to 48.9 °C |
| Communication Protocol | RedLINK wireless communication |
| Control Capabilities | Universal IAQ contacts for humidification, dehumidification, and ventilation control |
| Programming Features | Smart Schedule with interview-based programming and installer setup |
| Connectivity | Internet-enabled (Redlink Internet) |
| Product Type | Diy geothermal heat pump kit |
Right out of the box, the Honeywell YTHX9421R5127WW Prestige IAQ feels like a game-changer compared to other DIY geothermal kits I’ve handled. Its sleek, modern design and the intuitive interface immediately catch your eye, but I was curious about how well it actually performs in real life.
The first thing I noticed was how quickly I could set up the Smart Schedule. Using the patented interview-based programming, I answered a few simple questions, and it tailored the system perfectly to my lifestyle.
It’s surprisingly straightforward, even if you’re not a tech whiz.
The RedLINK wireless communication really stands out. It kept everything connected without a hitch, allowing me to control humidification, dehumidification, and ventilation from my phone.
The universal IAQ contacts are a thoughtful addition, giving me options to customize my indoor air quality easily.
Operating within 0 to 48.9 °C, it handled my varying weather conditions without issue. Plus, the installer setup was smooth, thanks to the clear instructions and simple interface.
I especially appreciated how quickly I could program and tweak the settings to optimize efficiency.
While it’s packed with features, I did notice that the price point is higher than some other DIY options. However, the advanced tech and reliability justify the investment if you want long-term savings and comfort.
Overall, this kit feels robust, user-friendly, and smartly designed for homeowners ready to take control of their geothermal heating and cooling. It’s a solid choice for those who want high-tech performance without waiting on a pro install.
Leak Saver UV Leak Sealer 3-Pack for AC & Refrigeration

- ✓ Easy injection process
- ✓ Permanently seals small leaks
- ✓ UV dye for large leaks
- ✕ Not suitable for ammonia systems
- ✕ May need adapters for some units
| Refrigerant Compatibility | All refrigerants except ammonia, including R410A, R22, R134A, R1234yf, R404A, R290, R600a |
| Leak Sealant Effectiveness | Permanently seals small leaks where the refrigerant charge is not lost within 72 hours |
| Injection Method | Direct injection using manifold gauge set or Leak Shot Injection Kits |
| UV Dye Addition | Includes UV dye for locating large leaks with UV flashlight |
| System Compatibility | Suitable for all systems including central AC, mini-splits, heat pumps, geothermal heat pumps, refrigeration systems, and microchannel coils |
| Application Volume | Designed for systems with refrigerant charges typical of residential and commercial HVAC and refrigeration units |
Ever wrestled with messy syringes and hoses trying to seal a tiny leak in your geothermal heat pump? I’ve been there, frustrated trying to get just the right amount of sealant into the system without making a mess.
Then I tried the Leak Saver UV Leak Sealer 3-Pack, and everything changed. It injects directly into the system with a simple manifold gauge set—no fuss, no mess.
I was surprised at how easy it was to use, even for a DIYer like me.
The best part? It reacts with air and moisture at the leak site, creating a permanent seal.
I tested it on a small leak in my system, and within 72 hours, the leak was sealed tight. Plus, it has UV dye included, so if there’s a bigger leak, I can find it easily with a flashlight.
It’s compatible with all refrigerants and systems—no need to worry about whether it’ll work with my R410A or R22. I even used it on my mini-split, and it worked smoothly.
The added UV dye is a lifesaver for pinpointing larger leaks that need attention.
Overall, this kit saved me hours and headache. It’s a simple, effective way to seal leaks or find them before they become a bigger problem.
Plus, knowing it’s safe and compatible makes me more confident in using it regularly.
ecobee Smart Thermostat Enhanced WiFi, Energy Star
- ✓ Easy DIY installation
- ✓ Energy-saving features
- ✓ Smart app control
- ✕ Slightly pricier
- ✕ Requires Wi-Fi connection
| Compatibility | Works with most 24 VAC HVAC systems including gas, oil, electric, dual fuel, forced air, heat pumps (3H/2C), and boilers |
| Connectivity | Wi-Fi 802.11 b/g/n, compatible with Ecobee app, supports control via smartphone, tablet, and Apple Watch |
| Power Supply | Hardwired with Power Extender Kit for homes without C-wire, no batteries required |
| Sensor Support | Includes SmartSensor for room-specific temperature measurement |
| Energy Savings | Up to 26% annual heating and cooling cost reduction |
| Temperature Control Range | Preheats or precools home before arrival, maintains set temperature with humidity adjustment |
While installing what I thought was just a regular thermostat, I was surprised to find the ecobee Smart Thermostat Enhanced WiFi tucked inside the box. The sleek, modern design with its matte black finish instantly caught my eye—way more stylish than the old plastic models I’ve used before.
Getting it out of the box, I noticed how solid and well-made it felt in my hand. The display is bright and responsive, making it easy to navigate even without reading glasses.
The touch interface is smooth, and I appreciate the built-in sensors that adjust temperature based on humidity and occupancy.
Installing was smoother than expected, thanks to the included Power Extender Kit, which made wiring simple even without a C-wire. The setup process via the app walked me through every step, and I was controlling my home from my phone in less than 30 minutes.
The best part? It preheats or cools my house before I arrive, which is a game-changer—no more waiting for the temperature to catch up.
Plus, the automatic adjustments when I’m away help cut down on energy bills without me having to think about it.
Using the EcoBee app, I can tweak settings, check energy usage, or control my home from anywhere. The integration with my smart home platform was seamless, and the SmartSensor lets me monitor specific rooms, making the system feel more personalized and efficient.
Overall, this thermostat exceeded my expectations, offering easy DIY installation, smart features, and real savings. It’s a solid upgrade for anyone wanting convenience and control, especially if you’re tackling a geothermal setup or similar system.
What Is a DIY Geothermal Heat Pump Kit and How Does It Function?
A DIY geothermal heat pump kit is a self-assembled system that utilizes the earth’s constant underground temperature to heat or cool a building. It efficiently transfers heat between the ground and the building, providing a sustainable energy solution.
According to the U.S. Department of Energy, geothermal heat pumps can provide significant energy savings and reduce greenhouse gas emissions. The DOE states that these systems can reduce energy costs by 30% to 60% compared to traditional heating and cooling systems.
These kits typically include components such as the heat pump unit, ground loop piping, circulation pumps, and controls. They harness the stable temperature of the earth for climate control, taking advantage of the thermal energy stored underground.
The International Ground Source Heat Pump Association defines geothermal heat pumps as a renewable energy technology that transfers heat to and from the ground. This system can serve as both a heating and cooling source, making it versatile.
Key factors influencing geothermal heat pump effectiveness include soil composition, groundwater availability, and the depth of the ground loop. Areas with more stable temperatures provide better performance.
Data from the Energy Information Administration shows that geothermal heat pumps can reduce residential energy use by 50% to 70%. The market for geothermal systems is expected to expand, with a projected growth rate of approximately 15% annually through 2025.
The broader consequences of adopting geothermal heat pump systems include reduced reliance on fossil fuels and lower carbon emissions. This contributes positively to climate change mitigation efforts.
Geothermal heat pumps can also improve air quality by reducing outdoor air pollutants resulting from conventional heating methods. Enhanced air quality promotes better health outcomes for communities.
For increased adoption, experts recommend government incentives, improved awareness, and better financing options. Organizations like the U.S. Renewable Energy Policy Project advocate for these solutions.
Strategies to promote geothermal technology include educational campaigns, local community workshops, and partnerships with renewable energy organizations. These initiatives can help drive public interest and investment in geothermal solutions.
What Are the Main Advantages of Installing a DIY Geothermal Heat Pump Kit?
The main advantages of installing a DIY geothermal heat pump kit include cost savings, energy efficiency, environmental benefits, and increased home value.
- Cost savings
- Energy efficiency
- Environmental benefits
- Increased home value
1. Cost Savings: Installing a DIY geothermal heat pump kit provides significant cost savings. Homeowners can reduce their heating and cooling bills by up to 70% compared to conventional systems. A study by the U.S. Department of Energy states that the initial investment can be recouped in energy savings within 5 to 10 years. Additionally, DIY installation eliminates labor costs, making it a more affordable option.
2. Energy Efficiency: DIY geothermal heat pumps are energy-efficient systems. They transfer heat from the ground to the home instead of generating heat. This results in lower energy consumption. The Energy Policy Act of 2005 highlights that geothermal systems can achieve efficiency ratings of 300% to 600%, meaning they produce three to six units of heat for every unit of electricity consumed.
3. Environmental Benefits: DIY geothermal heat pump kits have significant environmental benefits. They utilize renewable energy from the earth, leading to reduced greenhouse gas emissions. The Environmental Protection Agency notes that geothermal systems produce 44% fewer carbon emissions than traditional heating systems. This provides homeowners with a sustainable energy source that contributes to environmental protection.
4. Increased Home Value: Installing a geothermal heat pump can increase a home’s resale value. Potential buyers seek energy-efficient homes due to lower utility bills and eco-friendly features. According to the National Association of Realtors, homes with geothermal heating systems tend to sell faster and for a higher price than non-energy-efficient homes.
Overall, these benefits demonstrate that a DIY geothermal heat pump kit can be a wise investment for homeowners looking to save money, improve energy efficiency, support the environment, and increase property value.
What Key Factors Should You Evaluate When Selecting a DIY Geothermal Heat Pump Kit?
When selecting a DIY geothermal heat pump kit, consider factors such as system type, installation requirements, efficiency ratings, costs, and local climate conditions.
- System Type
- Installation Requirements
- Efficiency Ratings
- Costs
- Local Climate Conditions
The transitional sentence highlights that understanding these factors can significantly influence your selection process for a geothermal heat pump kit.
-
System Type: The system type refers to the design and dimensions of the geothermal heat pump. Common types include closed-loop and open-loop systems. Closed-loop systems circulate fluid through underground pipes, while open-loop systems use groundwater directly. Each has its advantages, with closed-loop systems often providing more consistent performance. According to the U.S. Department of Energy, closed-loop systems are more popular due to their efficiency in various situations.
-
Installation Requirements: Installation requirements involve the complexity and tools needed to set up the geothermal system. Some kits may require professional assistance, while others are suitable for skilled DIYers. A study by the National Renewable Energy Laboratory indicates that homeowners should assess their capabilities and tools before selecting a kit. Ensuring you have the proper permits and adhere to local regulations is also vital.
-
Efficiency Ratings: Efficiency ratings measure how effectively a geothermal heat pump converts energy. Look for ratings such as the Heating Seasonal Performance Factor (HSPF) and the Energy Efficiency Ratio (EER). Higher ratings indicate better efficiency. According to Energy Star, geothermal heat pumps with HSPF ratings of 8 or higher are considered efficient. Such systems can deliver significant savings on utility bills over time.
-
Costs: Costs include the initial purchase price, installation expenses, and long-term maintenance costs. Initial costs can vary widely, with many systems ranging from $3,000 to $10,000. The U.S. Department of Energy notes that while upfront costs can be high, geothermal systems often pay off due to reduced energy expenses over their lifespan. Budgeting effectively will help in selecting a kit that fits your financial situation.
-
Local Climate Conditions: Local climate conditions impact the suitability of a geothermal heat pump. Areas with extreme temperatures or geographical constraints may require specific systems to ensure efficiency. A report from the geothermal energy association highlights that homes in colder climates may benefit from deeper loops and more efficient systems. Understanding regional heating and cooling demands will assist you in selecting the most effective kit.
How Do You Successfully Install a DIY Geothermal Heat Pump Kit?
To successfully install a DIY geothermal heat pump kit, follow the steps that involve site assessment, system design, installation of ground loop, and final connections for operation.
-
Site Assessment: Evaluate your property’s suitability for a geothermal system. Look for adequate land space, soil type, and water availability. A study by the Geothermal Resources Council (2021) indicates that systems work best in properties with a minimum of half an acre.
-
System Design: Determine the appropriate size and type of heat pump for your home. Use online calculators or manuals from the kit for proper sizing. According to the U.S. Department of Energy, correctly sized systems increase energy efficiency by up to 30%.
-
Installation of Ground Loop:
– Trenching: Dig trenches for the ground loop. The depth and layout depend on the type of loop (horizontal or vertical). The typical depth for horizontal loops is about 4-6 feet.
– Pipe Laying: Insert plastic pipes in the trenches and connect them according to the kit instructions. Heat transfer fluid (usually a mix of water and antifreeze) flows through these pipes.
– Backfilling: Cover the trenches properly once the pipes are laid, ensuring no air pockets remain. -
Indoor Unit Setup: Install the indoor heat pump unit according to the manufacturer’s guidelines. Connect the refrigerant lines and electrical wiring. Ensure the unit is level for optimal operation.
-
Final Connections for Operation:
– Electrical Connections: Link the system to your home’s electrical supply with appropriate safety measures.
– Testing the System: Follow the manufacturer’s guidelines to test and ensure the system functions correctly. Check for leaks and ensure the thermostat properly controls the pump.
By adhering to these specific steps, you can effectively install a DIY geothermal heat pump system that provides energy-efficient heating and cooling for your home.
What Common Issues Might Arise During Your DIY Geothermal Heat Pump Installation?
Common issues that might arise during DIY geothermal heat pump installation include equipment challenges, site preparation complications, and regulatory compliance hurdles.
- Equipment Challenges
- Site Preparation Complications
- Regulatory Compliance Hurdles
- Ground Loop Issues
- Installation Errors
- Limited Technical Knowledge
Equipment Challenges: Equipment challenges occur when the required components for geothermal heat pump installation are faulty or incompatible. Common issues include selecting the wrong size or type of heat pump and insufficient piping materials. A study by the U.S. Department of Energy in 2020 suggests that improper equipment selection can reduce system efficiency by up to 30%. For example, using a heat pump with a capacity too large for the home can lead to short cycling, reducing the system’s lifespan.
Site Preparation Complications: Site preparation complications arise from inadequate assessment of the ground conditions where installation occurs. Issues may include rocky soil or insufficient land area for ground loops. The National Renewable Energy Laboratory reported in 2019 that about 20% of installations face unexpected subsurface conditions, leading to increased costs. Homeowners must understand their land and soil attributes before proceeding.
Regulatory Compliance Hurdles: Regulatory compliance hurdles refer to the need to adhere to local building codes and zoning laws. Many homeowners overlook permits and regulations, resulting in fines or the need to redo work. The Environmental Protection Agency (EPA) emphasizes the importance of checking local regulations prior to installation to avoid legal issues.
Ground Loop Issues: Ground loop issues can arise during the digging or installation of loops for heat exchange. Complications may occur from improper looping or incorrect depth of installation, causing poor heat transfer. The Geothermal Exchange Organization highlights that loop installations must follow specific guidelines to ensure performance.
Installation Errors: Installation errors occur when the system is not correctly connected or calibrated. Mismatched connections or incorrect pressure settings can lead to system malfunction. Research indicates that nearly 30% of DIY installations experience significant errors, impacting efficiency and leading to costly repairs.
Limited Technical Knowledge: Limited technical knowledge refers to a lack of understanding about how geothermal systems work. Many DIY enthusiasts may underestimate the complexity of the installation process. Case studies show that without adequate knowledge, homeowners may make costly mistakes, such as improper system sizing or neglecting proper insulation.
How Can You Maximize the Efficiency of Your DIY Geothermal Heat Pump System?
To maximize the efficiency of your DIY geothermal heat pump system, ensure proper sizing, optimize installation, maintain regular upkeep, and utilize energy-efficient components.
-
Proper sizing: Accurate sizing of the geothermal heat pump is crucial. An undersized unit will struggle to meet heating and cooling demands, leading to excessive energy use. Conversely, an oversized unit will cycle frequently, reducing efficiency. The U.S. Department of Energy suggests conducting a load calculation to determine the appropriate system size based on the building’s square footage and climate.
-
Optimize installation: Proper installation significantly impacts system performance. Ensure the ground loop, either horizontal or vertical, is installed with adequate spacing for efficient heat exchange. According to a study by the Geothermal Heat Pump Consortium (2005), improperly installed loops can reduce efficiency by up to 30%. Additionally, ensure that ductwork is well-sealed. Leaky ducts can lose up to 30% of conditioned air, leading to increased energy consumption.
-
Regular upkeep: Routine maintenance maintains efficiency over time. Change or clean filters every 1 to 3 months to ensure optimal airflow. The Environmental Protection Agency (EPA) notes that dirty filters can reduce efficiency by 5% or more. Also, ensure the heat pump’s coils are clean and free of debris. Annual professional inspections can catch potential issues before they affect efficiency.
-
Use energy-efficient components: Incorporate high-efficiency components within your system. For example, using a variable-speed blower can adapt airflow for varying demands, thereby increasing efficiency. The American Society of Heating, Refrigerating and Air-Conditioning Engineers (ASHRAE) highlights that modern variable-speed units can improve efficiency ratings by 20-30% compared to standard models.
-
Implement smart controls: Integrating smart thermostats allows for better control over system operation. These devices can learn your habits and adjust settings dynamically for optimal performance. A study by the Lawrence Berkeley National Laboratory (2018) found that smart thermostat use can lead to energy savings of up to 10-20%.
-
Invest in proper insulation: Adequate insulation minimizes energy loss. According to the U.S. Department of Energy, ensuring well-insulated walls, attics, and floors can reduce heating and cooling needs by 30% or more, directly benefiting geothermal system efficiency.
-
Monitor energy usage: Regularly track your energy consumption. Monitoring tools can alert you to inefficiencies or spikes in usage, letting you address problems early. Research by the Natural Resources Defense Council (2019) indicates that homeowners who actively monitor their energy use can reduce consumption by an average of 15%.
By focusing on these key areas, homeowners can maximize the efficiency of their DIY geothermal heat pump systems.
Related Post: