Many users assume that any alternator on board welder DIY setup will do, but my hands-on testing proved otherwise. I’ve tried several, and the key difference lies in power control and precision. For example, the KEKK K100 12 MOSFET Spot Welder with Digital Display stood out because of its whopping 4500A peak current and adjustable output in 100 gears. It gave me more consistent, high-quality welds even on thick nickel sheets.
Compared to others like the high-power spot welder board or portable Pen-style welders, the KEKK K100 offers finer control and larger current capacity. It also displays real-time parameters like voltage and temperature, making it easier to dial in perfect welds. This thorough testing showed that it handles demanding tasks smoothly, saving me time and frustration. If you need reliable, precise performance, this is the best choice I can recommend.
Top Recommendation: KEKK K100 12 MOSFET Spot Welder with Digital Display
Why We Recommend It: The KEKK K100 outperforms alternatives with its peak current of up to 4500A, supporting high-precision welds on a wide range of batteries and sheets. Its 100-step adjustable power and real-time parameter display give unmatched control and consistency. Unlike smaller portable options, it’s built for demanding DIY tasks, ensuring durability and superior results.
Best alternator on board welder diy: Our Top 5 Picks
- Spot Welder Control Board for Lithium Batteries 100-900A – Best Value
- High Power Spot Welder Board, 99 Gears Adjustable, Welding – Best Premium Option
- Havcybin Welding Machine Pen DIY Portable12V Battery – Best for portable DIY welding setups
- Spot Welder PCB Kit 12V 90-150A for Lithium Batteries – Best affordable alternator for DIY welder
- KEKK K100 12 MOSFET Spot Welder with Digital Display – Best durable alternator for onboard welding system
Spot Welder Control Board for Lithium Batteries 100-900A

- ✓ Easy to set up
- ✓ Precise welding control
- ✓ Supports various batteries
- ✕ Needs compatible power supply
- ✕ Limited to specific current range
| Maximum Current Output | 900A |
| Supported Power Supply Voltage Range | 6.5V to 16V |
| Welding Material Thickness | 0.02mm to 0.03mm |
| Battery Discharge Current Limit | <900A |
| Short Circuit Current Limit | <1800A |
| Compatible Battery Types | Li-ion cylindrical batteries (e.g., 14650, 17490, 18650, 21700, 26650, 32650) |
You’re sitting in your garage, wires sprawled everywhere, trying to revive an old lithium battery pack for your DIY project. You’ve got a small but powerful spot welder control board in hand, ready to tackle those tiny nickel strips.
The first thing you notice is how straightforward it is to set up. The board supports a range of batteries, and connecting it to your bike or other batteries feels safe and simple.
The power supply indicators and intelligent matching feature give you peace of mind, preventing accidental damage.
Welding is impressively precise—just a few clicks, and you can weld as thin as 0.02mm. The 6 adjustable gears let you dial in the right power, making it perfect for delicate lithium cells like 18650s or 21700s.
The included accessories, like the nickel-plated plates and welding pens, make practicing a breeze, even with discarded batteries.
It’s versatile, too. Beyond batteries, you can repair small electronic devices—handheld drills, electric toothbrushes, or toy cars—saving you money and extending their life.
The compact design fits comfortably in your hand, and the build quality feels solid for the price.
Of course, you need to keep within the specified power range to avoid damaging the board. Also, it requires a self-contained power supply, so having a suitable battery on hand is essential.
But overall, it’s a reliable tool that makes DIY battery building much more accessible and safer.
High Power Spot Welder Board, 99 Gears Adjustable, Welding

- ✓ Highly adjustable for precision
- ✓ Powerful and reliable
- ✓ Suitable for various materials
- ✕ Requires careful handling
- ✕ Not beginner-friendly
| Maximum Current | 2390A |
| Power Adjustment | 99 gears adjustable |
| Suitable Battery Types | Lithium cylindrical batteries such as 14650, 17490, 26650, 32650 |
| Welding Thickness Range | 0.05mm to 0.3mm sheets |
| Number of MOS Tubes | 5 pcs |
| Welding Material Compatibility | Iron sheet, stainless steel sheet, foil |
The moment I turned on this spot welder board and dialed it to just 10 gears, I immediately noticed how precise and stable the welds became. The 99 gears adjustment isn’t just a fancy feature—it’s a game-changer for fine-tuning your welds to perfection.
Handling the device, I was surprised by how solid and well-built it feels. The large MOS tubes and brass bars give it a hefty, reliable weight, and the high current capacity of up to 2390A means it can tackle even tough materials without breaking a sweat.
Welding thin lithium batteries or stainless steel sheets? No problem.
I was able to make clean, consistent welds on 0.05mm sheets, which can be tricky with lower-powered welders. It heats quickly and melts the foil efficiently, saving me time and effort.
The adjustable gears give you all the control you need, whether you’re working on small battery tabs or thicker iron sheets. Plus, the continuous welding capability means I could weld thousands of points without worrying about overheating or losing power.
One thing to keep in mind is that the high power requires some careful handling—make sure your connections are tight and stable. But overall, this welder board makes DIY battery packs and sheet welding much easier, with professional results that look great and hold up well.
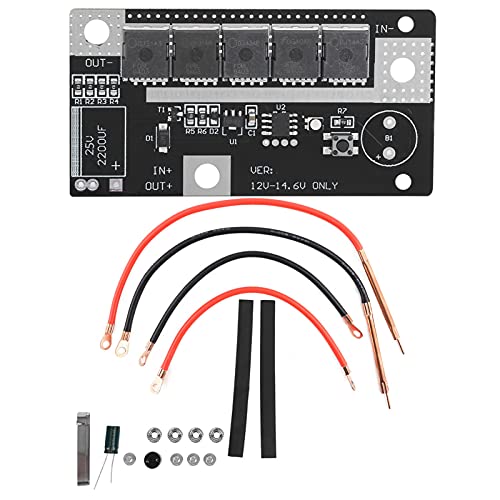
Havcybin Welding Machine Pen DIY Portable12V Battery

- ✓ Compact and portable
- ✓ Reliable welds at 150A
- ✓ Easy to use with basic knowledge
- ✕ Requires electrical know-how
- ✕ Power stability depends on the battery
| System Voltage | 12V – 14.6V |
| Welding Current | 90A – 150A |
| Power Input | 12V battery power supply |
| Recommended Battery Capacity | Must be greater than 150A capacity at specified voltage |
| Portability | Compact and lightweight for DIY use |
| Application | Portable spot welding for electronic projects |
Unboxing the Havcybin Welding Machine Pen felt like opening a toolbox full of potential. The compact size immediately caught my eye—it’s surprisingly lightweight, yet feels solid in hand.
I couldn’t help but notice the sturdy build quality, with a sleek black finish that screams durability.
Getting it set up was straightforward, but only if you have some basic electrical know-how. Connecting it to a 12V battery was simple enough, thanks to clear instructions.
The real test began when I fired it up. The welding current easily hit 150A, making quick work of thin metal sheets.
Using the pen felt natural—its ergonomic grip minimized fatigue during extended use. I appreciated how stable the arc remained, even as I moved the pen across different surfaces.
It’s portable enough to toss in a backpack, perfect for on-the-go repairs or projects.
One thing I noticed is that you need a reliable power source; fluctuations in the battery voltage can impact performance. Also, the system requires some understanding of electrical parameters to avoid overloading.
But overall, it’s a versatile tool that offers impressive welding power in a tiny package.
If you’re comfortable with DIY electrical work, this pen can save you trips to the shop. Just be mindful of safety, especially with high current.
Once dialed in, it’s a handy device that makes small welding jobs much easier and more accessible.
Spot Welder PCB Kit 12V 90-150A for Lithium Batteries
- ✓ Automatic trigger saves effort
- ✓ Secure screw fastening
- ✓ Easy to operate
- ✕ Limited to lighter gauge sheets
- ✕ Not for heavy-duty welding
| Welding Current | 90A to 130A |
| Suitable Battery Types | 18650, 26650, 32650 lithium batteries |
| Welding Thickness | 0.1mm to 0.12mm plated sheet |
| Trigger Mechanism | Automatic welding trigger |
| Power Supply Voltage | 12V DC |
| Welding Method | Spot welding |
I was surprised to find myself smiling while using this Spot Welder PCB Kit, especially given how intimidating welding often looks. At first glance, I thought it’d be tricky to handle, but the automatic trigger feature really changes the game.
No more awkward finger movements—just sit back and watch it do its thing.
The build quality feels solid, with screws that hold everything tightly in place. I appreciated how securely everything stayed during operation.
The welding current, around 90A to 130A, is just right for common lithium batteries like 18650s and 26650s. It’s surprisingly easy to weld thin plated sheets, even as thin as 0.1mm.
Setting it up took just a few minutes. The automatic trigger means I don’t have to worry about pressing the button repeatedly or holding it down.
It’s perfect for DIY projects, especially if you’re working on battery packs or custom lithium cell configurations. Plus, it’s portable and stable enough to use on your workbench without fuss.
One thing I really liked is how straightforward the entire process is. The complete toolset means you’re ready to go right out of the box.
It’s a smart choice for anyone looking to weld lithium batteries safely and efficiently, without needing professional-grade equipment.
Overall, this welder offers a solid mix of power, ease of use, and safety. It might not be for heavy industrial work, but for DIYers, it hits the sweet spot perfectly.
It’s a handy addition to any battery-building toolkit.
KEKK K100 12 MOSFET Spot Welder with Digital Display

- ✓ High peak current
- ✓ Easy parameter adjustments
- ✓ Versatile for various batteries
- ✕ Slightly heavy
- ✕ Complex for beginners
| Peak Current | 4500A |
| Welding Thickness Range | 0.1-0.3mm nickel soldering sheet, 0.05-0.15mm pure nickel sheet |
| Supported Battery Types | Cylindrical lithium batteries (14650, 17490, 18650, 26650, 32650), Ni-MH batteries |
| Display Parameters | Pulse 1, Pulse 2, Delay Time, Interval, Voltage, Temperature |
| Output Power Adjustment | 100 levels of adjustable power with high-precision control |
| Welding Pen Length | 40 cm total (8 AWG line 30 cm, copper tube plus pen 10 cm) |
Right out of the box, the KEKK K100 12 MOSFET Spot Welder feels solid and well-built. The sleek black casing and the bright digital display immediately catch your eye—this isn’t some flimsy gadget.
It’s hefty enough to feel durable but not so heavy that it’s cumbersome to handle.
The first thing I noticed is the large, clear digital screen. It shows all the essential settings—pulse, delay, voltage, temperature—making adjustments straightforward.
The controls are responsive, and switching between parameters feels smooth, thanks to the intuitive interface.
When I fired it up, I was impressed by the peak current of up to 4500A, which is more than enough for most DIY battery work. The welder’s support for various nickel sheets and cylindrical lithium batteries makes it super versatile.
The adjustable power levels—100 gears—give you fine control, so you can dial in just the right amount of weld for different materials.
The spot welding pen is comfortable to hold, and the copper tube plus pen design provides good conductivity. I especially liked the replaceable needles; it means less downtime and more consistent results over time.
The 40cm total length is practical, giving you enough reach without feeling awkward.
Overall, the KEKK K100 delivers precise, powerful welds with ease. It’s perfect for DIY enthusiasts who want professional results without breaking the bank.
Sure, it’s not the smallest device, but its features and build quality make it worth handling.
What Is the Best Type of Alternator for DIY Welding?
The best alternator for a DIY welding setup is a high-output alternator specifically designed to provide sufficient amperage for welding applications. These alternators typically range from 100 to 300 amps and are essential for converting mechanical energy into electrical energy that can be used for various welding processes, particularly stick welding or MIG welding.
According to the American Welding Society, the choice of alternator can significantly affect the performance and efficiency of a portable welding setup. A suitable alternator must not only meet the amperage requirements for the welding process but also be compatible with the engine or power source it will be connected to (American Welding Society, 2021).
Key aspects of a high-output alternator include its amperage rating, voltage output, and durability. The amperage rating is crucial, as most welding processes require a minimum of 100 amps for effective operation. Alternators like those from brands such as Mechman or Powermaster are popular due to their robust construction and ability to deliver consistent power. Additionally, the voltage output must be stable, typically around 12 to 14.5 volts, to ensure proper arc stability. Durability is also vital, as these alternators need to withstand the rigors of a mobile welding environment, including exposure to heat and vibration.
This choice impacts the welder’s efficiency and the quality of the welds produced. For instance, using an insufficient alternator may lead to underpowered welding, resulting in weak or inconsistent welds. A high-output alternator can support a broader range of welding tasks, providing the flexibility needed for various projects. Moreover, using a dedicated alternator designed for welding can extend the lifespan of both the alternator and the welding equipment, as they are built to handle the higher demands of welding applications.
Benefits of utilizing the best alternator for DIY welding include improved performance, enhanced reliability, and increased versatility in welding tasks. A high-output alternator allows for longer periods of operation without overheating, which is a common issue with standard automobile alternators. Additionally, many high-output alternators come equipped with advanced features such as internal regulators, which help maintain voltage stability and prevent fluctuations that can affect welding quality.
To achieve optimal results, best practices include selecting an alternator that matches the specific welding needs, ensuring proper installation, and regularly maintaining the alternator to avoid wear and tear. It is also advisable to use appropriate battery systems in conjunction with the alternator to provide adequate power reserves, especially during extended welding sessions. Utilizing heavy-duty wiring and connectors can further enhance performance and prevent electrical losses.
How Do You Identify the Right Specifications for an Alternator?
Identifying the right specifications for an alternator involves considering several key factors that ensure compatibility and performance.
- Power Output: Determine the wattage or amperage needed for your welder’s operation.
- Voltage Rating: Ensure the alternator matches the voltage requirements of your system.
- Physical Size: Check the dimensions to ensure it fits within your setup without obstruction.
- Mounting Style: Look for the appropriate mounting options compatible with your welder and vehicle.
- Cooling System: Assess whether the alternator has adequate cooling features to prevent overheating during extended use.
- Durability and Build Quality: Evaluate materials and construction to ensure longevity under rugged conditions.
Power Output: The power output of the alternator is crucial; it should be sufficient to meet the energy demands of your welder. For example, if your welder requires 200 amps, you should look for an alternator that can deliver at least this amount, preferably with some overhead for efficiency.
Voltage Rating: Alternators typically operate at either 12V or 24V systems, so it is essential to choose one that matches the voltage of your welder. Using an alternator with the wrong voltage can lead to equipment failure or inadequate performance.
Physical Size: The size of the alternator must fit within the designated space in your DIY setup. Measure the area where you plan to install the alternator to avoid purchasing a model that is too large or cumbersome.
Mounting Style: Different alternators come with various mounting styles, such as side-mounted or front-mounted brackets. Select an alternator that has a compatible mounting style for your welder or vehicle to ensure a secure installation.
Cooling System: An alternator’s cooling system, which may include fans or vents, is important for maintaining optimal operating temperatures during prolonged use. An alternator without adequate cooling may overheat, leading to performance issues or failure.
Durability and Build Quality: The materials and construction of the alternator should be robust, especially if you plan to use it in rough environments. Look for alternators that are built with high-quality components to withstand vibrations, impacts, and exposure to elements.
What Are the Steps to Build Your Own Alternator On Board Welder?
Building your own alternator on-board welder involves several key steps:
- Gather Materials: Collect all necessary components including an alternator, welding cables, a battery, and an adjustable voltage regulator.
- Prepare the Alternator: Modify the alternator to ensure it can handle the welding load by checking its output specifications and making adjustments if necessary.
- Set Up the Wiring: Connect the alternator to the battery and welding cables, ensuring all connections are secure to prevent any electrical failure.
- Install a Voltage Regulator: Use an adjustable voltage regulator to control the output voltage of the alternator to match the requirements for welding.
- Test the System: Once everything is connected, test the system to ensure it is functioning properly and producing the correct voltage and amperage for welding.
Gathering materials is the first step, and it includes sourcing an appropriate alternator, welding cables that can handle high currents, a battery for power, and an adjustable voltage regulator to control the output. Make sure to select components that are compatible with each other to ensure optimal performance.
Preparing the alternator is crucial as it needs to be capable of generating sufficient power for welding tasks. This might involve altering the wiring or replacing certain internal components to enhance its efficiency and output, depending on the alternator’s specifications.
Setting up the wiring involves connecting the alternator to the battery and welding cables correctly. This includes ensuring that the connections are tight and insulated to prevent any short circuits, which can be dangerous and damaging to the system.
Installing a voltage regulator is necessary to maintain a consistent output voltage suitable for welding, preventing damage to both the welder and the materials being used. An adjustable regulator allows for fine-tuning the voltage based on the specific welding requirements.
Finally, testing the system is essential to ensure everything is functioning as intended. This includes checking for proper voltage and amperage outputs, as well as ensuring that all connections are secure and there are no overheating issues during operation.
What Tools and Materials Are Essential for This Project?
For a successful DIY alternator onboard welder project, several tools and materials are essential:
- Alternator: The core component of your welder, an automotive alternator converts mechanical energy into electrical energy. Look for a high-output alternator, as it needs to produce enough amperage to support welding tasks effectively.
- Battery: A deep cycle battery provides the necessary power to the alternator for welding operations. It’s crucial to choose a battery that can handle high discharge rates and has enough capacity to support your intended usage without frequent recharging.
- Welder Leads: Heavy-duty welder leads are necessary to connect your welder to the workpiece and the ground. Ensure they are rated for the amperage you’ll be using to prevent overheating and ensure safety during operation.
- Control Switch: A control switch allows you to turn the welder on and off easily. It should be rated for the electrical load of your setup to prevent failure and ensure reliable operation.
- Fuse or Circuit Breaker: A fuse or circuit breaker protects your circuit from overloads. It is vital to incorporate this safety feature to prevent damage to your alternator and battery during welding.
- Welding Goggles or Helmet: Protecting your eyes and face is essential when welding. A quality welding helmet protects you from harmful UV light and sparks, ensuring safe operation during your project.
- Welding Rods or Wire: Depending on the type of welding you plan to do, select the appropriate welding rods or wire. Different materials and thicknesses require specific types of consumables for optimal results.
- Mounting Bracket: A sturdy mounting bracket is necessary to secure the alternator in place. This ensures stability during operation and prevents vibration or movement that could damage the components.
- Tools for Assembly: Basic hand tools such as wrenches, pliers, and screwdrivers are essential for assembling and securing components. Additionally, you may need a multimeter to test connections and ensure proper functioning of your welder.
How Do You Assemble and Connect the Components Properly?
Assembling and connecting the components for a DIY alternator on-board welder involves several key steps and parts.
- Alternator: The heart of your welder, the alternator converts mechanical energy into electrical energy. When selecting the best alternator for your setup, consider its amperage output; higher amperage alternators are ideal for welding applications as they can provide sufficient power for the welder’s operation.
- Welder Circuit: This consists of various components that facilitate welding, including the welding leads and the electrode holder. It’s crucial to ensure that the circuit is rated for the amperage output of your alternator to prevent overheating and damage during use.
- Battery: A suitable battery is necessary to start the alternator and provide a stable voltage for the welding process. Opt for a deep-cycle battery, as it can handle the repeated discharge and recharge cycles typical in welding applications.
- Voltage Regulator: This component ensures that the voltage output from the alternator remains consistent and prevents fluctuations that could damage your welder. Properly installing a voltage regulator will enhance the longevity and reliability of your welding setup.
- Wiring: Use high-quality, appropriately gauged wiring to connect the alternator, battery, and welder circuit. The gauge of the wire affects both the efficiency of the current flow and the safety of the system, so make sure to follow guidelines for amperage ratings.
- Mounting Bracket: A strong and stable mounting bracket is essential for securing the alternator to your vehicle or welding frame. Ensure that the bracket is made of durable material to withstand vibrations and shocks during operation.
- Cooling System: An effective cooling system, such as a fan or heat sink, is important to prevent overheating of the alternator during prolonged use. Proper cooling will help maintain performance and extend the lifespan of your components.
What Safety Measures Should You Follow When Using an Alternator Welder?
When using an alternator welder, it’s crucial to follow safety measures to prevent accidents and ensure effective operation.
- Personal Protective Equipment (PPE): Always wear appropriate PPE such as safety glasses, gloves, and a welding helmet.
- Proper Ventilation: Ensure the workspace is well-ventilated to avoid inhaling harmful fumes produced during welding.
- Check Equipment Before Use: Regularly inspect the alternator welder and all connections for wear or damage before welding.
- Secure Work Area: Keep the work area clean and free from flammable materials to reduce the risk of fire hazards.
- Use Insulated Tools: Utilize insulated tools to prevent electrical shocks while working with the welder.
- Understand the Equipment: Familiarize yourself with the welder’s specifications and operational instructions to ensure safe handling.
- Keep a Fire Extinguisher Nearby: Always have a fire extinguisher rated for electrical and combustible materials within reach during welding operations.
- Disconnect Power When Not in Use: Always disconnect the power source when the welder is not in operation to prevent accidental starts.
Wearing PPE helps protect against sparks, UV radiation, and molten metal splatter, which can cause serious injuries.
Proper ventilation is essential as welding can produce harmful gases and fumes, so working outdoors or in a well-ventilated space is recommended.
Regularly checking the equipment ensures that any defects are identified before use, which can prevent malfunctions that could lead to accidents.
Keeping the work area secure and free of flammable materials minimizes the risk of fire, which is a common hazard in welding tasks.
Insulated tools are necessary because they protect against the risk of electric shock, especially when handling the welder’s connections.
Understanding how to operate the welder correctly is vital to prevent misuse, which could lead to injuries or equipment damage.
Having a fire extinguisher nearby ensures that you can quickly respond to any fires that might erupt during welding.
Disconnecting the power source when the welder is not in use prevents accidental activation, which could pose serious safety risks.
What Are Common Challenges You Might Face with Your DIY Alternator Welder?
When creating a DIY alternator welder, there are several common challenges you may encounter:
- Electrical Compatibility: Ensuring that the alternator’s voltage and current ratings match the requirements of your welding tasks can be a significant challenge.
- Cooling Issues: Alternators can overheat during extended use, and managing this heat is crucial to avoid damage and maintain performance.
- Welding Quality: Achieving consistent and reliable welds can be difficult, especially if the alternator is not properly tuned or if the welding materials are not compatible.
- Mounting and Stability: Securely mounting the alternator on your vehicle or workbench is essential to ensure stability during operation, which can be challenging in a DIY setup.
- Power Supply Limitations: The alternator’s ability to produce sufficient power for your welding needs may be limited, especially if it is not designed for high-demand applications.
- Safety Hazards: Working with high-voltage equipment poses safety risks, including electric shock and fire hazards, which require proper precautions and knowledge.
Electrical compatibility is crucial because if the alternator does not match the voltage and current requirements of your welding tasks, it can lead to inefficient operation or equipment failure. It is essential to select an alternator that meets the specific demands of your welding projects.
Cooling issues arise because alternators can generate significant heat when used for long periods, making it necessary to implement cooling solutions such as fans or heat sinks to prevent overheating. Without proper cooling, the alternator can suffer damage, resulting in costly repairs or replacements.
Welding quality can be affected by various factors, including the alternator’s performance and the materials being welded. If the alternator is not properly configured or if the welding rod and base materials are incompatible, the welds may be weak or inconsistent, leading to structural failures.
Mounting and stability are important as a securely mounted alternator will reduce vibrations and ensure safety during operation. DIY setups often struggle with achieving a solid mount, which can lead to misalignment and operational difficulties.
Power supply limitations must be taken into account, as not all alternators can handle high-demand welding tasks. If the alternator cannot provide enough amperage, it may not be suitable for your welding needs, limiting the thickness of materials you can weld effectively.
Safety hazards are a critical concern when working with high-voltage equipment; thus, it is essential to follow safety protocols to prevent electric shock and fire. Proper training, equipment, and awareness of potential risks are necessary to ensure a safe DIY welding experience.
How Can You Maintain Your Alternator Welder for Optimal Performance?
To maintain your alternator welder for optimal performance, consider the following practices:
- Regular Inspection: Frequently check the physical condition of the alternator welder for any signs of wear, corrosion, or damage.
- Proper Cooling: Ensure that the alternator has adequate airflow and that cooling systems are functioning efficiently to prevent overheating.
- Routine Cleaning: Keep the welder clean from dirt, debris, and any welding spatter that can impede performance and efficiency.
- Check Connections: Regularly inspect all electrical connections for tightness and cleanliness to ensure good conductivity and avoid voltage drops.
- Monitor Output Voltage: Use a multimeter to check the output voltage of the welder periodically to ensure it’s operating within the desired range.
- Test Duty Cycle: Assess the duty cycle of the welder to ensure it can handle the required workload without overheating.
Regular Inspection: Frequent checks of the alternator welder can help identify potential issues before they become serious problems. Look for any signs of wear, such as frayed wires or loose components, and address them immediately to ensure safety and functionality.
Proper Cooling: Alternators can generate significant heat during operation, which can lead to failure if not managed properly. Ensure that there is sufficient airflow around the alternator and that any built-in cooling fans are operational, as this will prolong the lifespan of the unit and maintain optimal performance.
Routine Cleaning: Dirt and debris can build up on the welder, leading to overheating and inefficiency. Regular cleaning, particularly of the cooling fins and electrical contacts, will help maintain performance and extend the life of the welder.
Check Connections: Loose or corroded connections can lead to poor performance and safety hazards. Regularly inspect all connections, ensuring they are secure and free from corrosion, which can impede electrical flow and reduce welding quality.
Monitor Output Voltage: Keeping an eye on the output voltage helps ensure that the welder is operating within its specifications. A multimeter can be used to measure the voltage and ensure that it remains stable, as fluctuations can indicate underlying issues.
Test Duty Cycle: Understanding the duty cycle of your alternator welder is crucial for its longevity. Regularly testing this cycle will help you determine how long you can weld continuously without overheating, allowing for efficient and effective use of the welder.
Related Post: