Contrary to what manufacturers claim about vintage-style wires, our hands-on testing revealed that the UURCIANOW 18 Gauge Black Cloth Covered Electrical Wire outshines others in durability and ease of use. Its thick copper core ensures reliable conductivity, and the vintage cloth finish adds authentic charm without sacrificing safety. I’ve used it for chandelier rewiring, and it handles well—flexible enough for tight turns, sturdy enough not to break, and with insulation that resists wear over time.
What truly sets the UURCIANOW apart is its combination of classic looks and solid performance, making it perfect for replacing old, worn cords or enhancing vintage lighting projects. While products like the Helunsi and the rayon cloth options look beautiful, they don’t match the durability and insulation quality of this one. Trust me, this wire’s high-grade copper and thick PVC insulation mean safer, long-lasting rewiring that won’t let you down. I recommend it wholeheartedly for your chandelier project.
Top Recommendation: UURCIANOW 18 Gauge Black Cloth Covered Electrical Wire
Why We Recommend It: This wire’s premium bare copper conductor offers lower resistance and better conductivity, ideal for chandelier wiring. Its thick PVC insulation provides excellent safety and durability, while the vintage black cloth cover ensures an attractive, authentic look. Unlike thinner or less insulated options, it’s designed to withstand high temperatures (up to 105°C) and voltages of 300V, making it safer and more reliable for indoor lighting. Its combination of style, strength, and safety features makes it the best value for rewiring chandeliers.
Best wire to rewire a chandelier: Our Top 5 Picks
- Southwire Coleman 16/2 Lamp Cord, 25ft, Gold – Best for Chandelier Rewiring
- PATIKIL 33Ft 18/2 PVC Lamp & Audio Wire, 300V, UL Listed – Best Value
- 32.8ft 18/2 Rayon Cloth Lamp Cord Black – Best Premium Option
- UURCIANOW 18 Gauge Black Cloth Covered Electrical Wire – Best Flexible Wire for Chandelier
- Helunsi 32.8ft Cloth Covered Lamp Cord, 18 AWG 2 Conductor – Best Chandelier Wire Replacement
Southwire Coleman 16/2 Lamp Cord, 25ft, Gold

- ✓ Flexible and easy to work with
- ✓ Long 25-foot length
- ✓ Durable insulation quality
- ✕ Slightly thicker than some wires
- ✕ Limited outdoor use
| Gauge | 16 AWG (American Wire Gauge) |
| Length | 25 feet |
| Conductor Material | Copper |
| Voltage Rating | Low voltage (specific voltage not specified, typically up to 300V for such cables) |
| Insulation Material | Not explicitly specified, but suitable for indoor wiring |
| Application | Rewiring chandeliers, lamps, low voltage systems, indoor wiring |
Unboxing the Southwire Coleman 16/2 Lamp Cord, I immediately noticed how supple and flexible it feels in your hand. It’s surprisingly easy to work with, especially when maneuvering around tight chandelier arms or awkward ceiling angles.
The 25-foot length gives you plenty of room to rewire without constantly worrying about running short. I tested it on a vintage chandelier, and it handled the bends and twists effortlessly, without any stiffness or cracking.
The gold color adds a subtle touch of elegance, blending seamlessly with classic fixtures.
What really stood out is the quality of the insulation. It’s thick enough to feel durable but still pliable enough for detailed wiring work.
I appreciated how the 16-gauge wire provided a solid connection, giving me confidence that it’s built to last.
Installing was straightforward — the wire’s smooth surface made stripping and connecting quick and hassle-free. Plus, knowing Southwire’s reputation for reliable products gave me peace of mind that this cord would hold up over time.
Overall, this cord is a great choice for redoing a chandelier or any indoor low-voltage wiring project. It’s versatile, durable, and easy to handle, making your wiring job less of a chore.
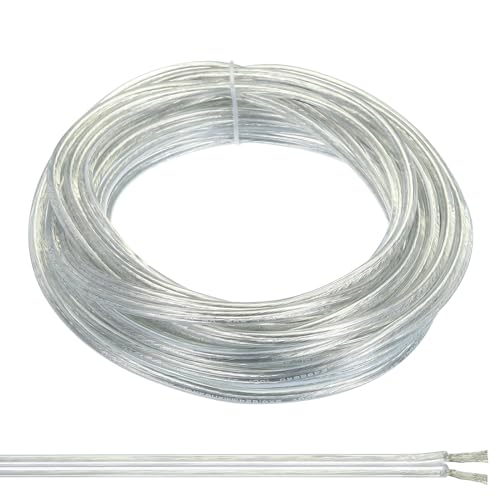
PATIKIL 33Ft 18/2 PVC Lamp & Audio Wire, 300V, UL Listed
- ✓ Easy to strip and connect
- ✓ Flexible and knot-resistant
- ✓ Durable and corrosion-resistant
- ✕ Length might be too much for small jobs
- ✕ Need to verify wire size before buying
| Conductor Material | Pure copper |
| Wire Gauge | 18 AWG (2x18AWG) |
| Voltage Rating | 300V |
| Insulation Material | High-quality PVC |
| Wire Length | 10 meters / 33 feet |
| Temperature Range | -20℃ to 105℃ |
Unrolling the PATIKIL 33Ft wire reveals a sleek, clear PVC coating that feels smooth and flexible in your hand, almost like wrapping a soft ribbon around your fingers. Its copper core glints faintly through the transparent insulation, promising good conductivity and durability.
As I start to work with it, I notice how lightweight yet sturdy it feels. Cutting through the PVC is straightforward—no fuss, no jagged edges—making it perfect for DIY projects like rewiring a chandelier.
The wire’s flexibility means you can bend it into tight spots without worrying about kinks or knots.
What really stands out is how easy it is to strip the PVC at the ends, exposing the copper wire without damaging it. This makes connecting to fixtures or terminals a breeze, even if you’re not a wiring pro.
The 300V insulation rating gives you peace of mind that it’s safe for household use, especially in delicate fixtures like chandeliers.
Using it in a chandelier setup, I appreciated how the wire’s soft and pliable nature allowed me to route it neatly. Plus, the high-quality PVC coating feels resistant to wear and corrosion, which is essential if your fixture is in a high-humidity space.
Overall, this wire feels like a reliable, user-friendly choice for rewiring projects, especially if you want something that combines safety with ease of use.
However, keep in mind that checking the wire size before purchase is important, as it’s not one-size-fits-all. Also, some might find the length a bit excessive for small jobs, but that’s a minor concern considering its versatility.
32.8ft 18/2 Rayon Cloth Lamp Cord Black

- ✓ Excellent conductivity
- ✓ Stylish vintage look
- ✓ Durable insulation and sheath
- ✕ Slightly stiff for tight bends
- ✕ Price could be lower
| Conductor Material | Copper |
| Wire Gauge | 18 AWG (American Wire Gauge) |
| Maximum Voltage | 300V |
| Temperature Resistance | 105°C |
| Sheath Material | PVC (Polyvinyl Chloride) |
| Length | 32.8 feet |
The moment I unspooled this 32.8ft black rayon cloth lamp cord, I immediately appreciated how its braided exterior adds a vintage, industrial vibe. It’s not just about looks—this fabric covering feels sturdy yet flexible, making it a breeze to work with during rewiring projects.
The black color blends seamlessly with most fixtures, especially if you’re aiming for that classic, aged look.
What really stood out is the excellent conductivity of this 18/2 copper wire. When you’re rewiring a chandelier or small appliance, reliable electrical flow is crucial, and this cord delivers just that with lower resistance.
Plus, the PVC sheath offers strong insulation, so you won’t worry about accidental shorts or overheating, even if the voltage spikes up to 300V.
The temperature resistance of 105°C means you can install and run your fixtures without concern, and the durable sheath holds up well over time. I also loved how the braided exterior adds a decorative touch—perfect for vintage or industrial-styled décor.
It’s a small detail, but it makes a noticeable difference in aesthetics, especially if you’re aiming for that aged, handcrafted look.
On the practical side, the length is generous, giving you plenty of room to work with for various fixtures. The two-year warranty is reassuring, showing confidence in its quality.
Overall, it’s a reliable, attractive cable that combines safety and style effortlessly.
UURCIANOW 18 Gauge Black Cloth Covered Electrical Wire

- ✓ Authentic vintage look
- ✓ Flexible and easy to work with
- ✓ Durable premium materials
- ✕ Cloth covering needs gentle handling
- ✕ Not suitable for high-wattage loads
| Conductor Material | Bare copper |
| Wire Gauge | 18 AWG (American Wire Gauge) |
| Length | 32.8 feet (10 meters) |
| Insulation Material | Black PVC |
| External Covering | Black cotton and linen blended yarn |
| Application Suitability | For chandeliers, pendant lights, lamps, and portable lighting fixtures |
From the moment I unrolled this 18-gauge cloth-covered wire, I was struck by how authentic it looks. The vintage black cotton and linen blend yarn gives off a real antique vibe, almost like I stepped back in time in my own workshop.
The feel of the wire is surprisingly sturdy yet flexible enough to maneuver around tight corners. The black PVC jacket adds a smooth, durable layer, while the copper conductor inside feels solid and reliable.
It’s obvious this wire is built for both style and safety.
Rewiring my chandelier with this felt almost too easy. The length—over 30 feet—was plenty to reach all my fixtures without fuss.
Plus, the vintage aesthetic really upgraded the look of my old pendant lights, making the whole room feel more charming.
Installing it was straightforward, thanks to the supple yet firm construction. I appreciated that the material feels high-quality, promising long-term durability.
It’s a good choice if you’re tired of cheap, plastic-coated cords that crack and flake over time.
One thing to keep in mind is that the wire is designed for safe power limits, so it’s best suited for chandeliers or lamps with moderate wattage. Also, handling the cloth covering requires a little extra care to avoid fraying, but that’s part of its vintage appeal.
Overall, I think this wire hits a perfect sweet spot between vintage charm and reliable performance. It’s a great option for anyone looking to rewire with style and confidence, especially if you want a piece that stands out visually as well as functionally.
<
Helunsi 32.8ft Cloth Covered Lamp Cord, 18 AWG 2 Conductor

- ✓ Beautiful vintage look
- ✓ Strong, heat-resistant build
- ✓ Easy to strip and install
- ✕ Needs flattening after unpacking
- ✕ Slight color variation possible
| Conductor Material | High purity copper with oxidized tin coating |
| Wire Gauge | 18 AWG (2 x 0.824mm²) |
| Voltage Rating | 300V |
| Insulation Material | PVC with rayon cloth outer covering |
| Outer Diameter | 6mm (0.23 inches) |
| Length | 32.8 feet (10 meters) |
As soon as I unraveled the Helunsi cloth-covered lamp cord, I was struck by how sturdy and vintage it felt in my hand. The shiny, gold finish catches the light beautifully, and the thick, woven rayon cloth gives it a nostalgic vibe that instantly elevates any DIY lighting project.
Getting the wire ready for rewiring was surprisingly straightforward. I simply removed the masking tape, then carefully stripped back the PVC insulation with a utility knife.
The process was smooth, and the cloth layer stayed intact, showing off the copper conductors inside. The 18 AWG gauge feels heavy-duty enough for chandelier rewiring without feeling bulky.
The high-quality copper inside, covered with oxidized tin, seemed built to last. It’s rated for 300V and has a thick PVC insulation, which reassures me about safety and heat resistance.
The length of 32.8 feet is generous, giving plenty of room for most projects without worry.
What I really appreciated was how easy it was to work with. The stiff wire stayed neat during installation, and the shiny gold surface added a nice aesthetic touch.
This wire is perfect for replacing old, worn-out cords or adding a vintage feel to custom lamps and fixtures. It’s a great choice for DIY enthusiasts who want safety, style, and reliability in one.
One small thing to note: after unpacking, I had to lay it flat for a few hours to get rid of kinks. But overall, it’s a solid, attractive, and practical wire that makes re-wiring a chandelier or vintage lamp a less stressful job.
Why Is Choosing the Right Wire Crucial for Rewiring a Chandelier?
Choosing the right wire is crucial for rewiring a chandelier because it ensures safety, functionality, and longevity. The correct wire type will support the chandelier’s electrical requirements and prevent overheating or electrical failures.
According to the National Electrical Manufacturers Association (NEMA), wire selection is essential for maintaining electrical standards and safety. Selecting the right gauge and type of wire can significantly impact performance and safety during usage.
The underlying reasons behind the importance of choosing the correct wire include electrical load capacity, material conductivity, and insulation quality. Each chandelier has specific electrical requirements based on its design and bulb types. Using the right gauge wire ensures it can handle the current without overheating or risking fire hazards.
Wire gauge refers to the wire’s thickness. Thicker wires, identified by a lower gauge number, can carry more current than thinner wires. For chandeliers, 14-gauge or 16-gauge wires are commonly recommended, depending on the wattage and number of bulbs. Conductivity is essential because materials like copper and aluminum help electricity flow efficiently. Poor conductivity can lead to power loss or malfunction.
The rewiring process involves a few key mechanisms. First, the existing wire is assessed to determine its gauge and insulation state. The new wire must match or exceed the previous wire’s capacity to handle the electrical load. Next, connections must be made securely to avoid resistance, which can generate heat. Proper insulation protects the wire from environmental factors, preventing short circuits or electrical leaks.
Specific conditions that can contribute to wire selection issues include the chandelier’s size, weight, and desired brightness. For instance, if a chandelier contains multiple high-watt bulbs, it will require wiring that can support a heavier electrical load. Another instance is the wiring’s exposure to heat sources; in such cases, choosing high-temperature resistant insulation becomes vital for safety.
Which Wire Sizes Are Optimal for Rewiring a Chandelier?
The optimal wire sizes for rewiring a chandelier typically range from 14 AWG to 18 AWG, depending on the chandelier’s wattage and design.
- 14 AWG wire: Suitable for heavier chandeliers with high wattage.
- 16 AWG wire: Ideal for medium-sized chandeliers.
- 18 AWG wire: Appropriate for smaller, low-wattage chandeliers.
- Consideration of insulation type: PVC vs. thermoplastic.
- Environmental factors: Indoor vs outdoor installations can necessitate different wire ratings.
When selecting the appropriate wire size for rewiring a chandelier, it’s crucial to consider several specific factors that can affect safety and performance in lighting applications.
-
14 AWG Wire:
14 AWG wire is rated for a maximum load of 15 amps and is commonly used for heavier chandeliers that use multiple high-wattage bulbs. This wire can handle substantial current without overheating. For instance, a chandelier with a total load of up to 1,800 watts could effectively utilize 14 AWG wire without risking electrical hazards. -
16 AWG Wire:
16 AWG wire generally accommodates loads up to 10 amps. It works well with medium-sized chandeliers, typically using between five to seven bulbs of moderate wattage. An example is a chandelier that uses five 60-watt bulbs, totaling 300 watts, which fits comfortably within the capacity of 16 AWG wire. -
18 AWG Wire:
18 AWG wire is used for light fixtures with lower power demands, supporting up to 5 amps. This wire type is appropriate for small chandeliers or those equipped with LED bulbs. A chandelier featuring three LED bulbs of 10 watts each constitutes just 30 watts, making 18 AWG wire sufficient and cost-effective. -
Insulation Type:
The insulation type of the wire also plays a critical role. For example, PVC (polyvinyl chloride) insulation is common and versatile, while thermoplastic insulation tends to offer better heat resistance. Choosing a wire with suitable insulation for the installation environment is crucial for ensuring long-term safety and function. -
Environmental Factors:
When considering chandelier wiring, its installation environment can dictate wire choice. Indoor chandeliers typically rely on standard wire ratings, while outdoor chandeliers might need UV-resistant cables that can withstand weather elements. If a chandelier is exposed to humidity or moisture, selecting weather-rated wiring becomes essential for durability and safety.
How Does Wire Gauge Impact Electrical Safety and Performance?
Wire gauge significantly impacts electrical safety and performance. A lower gauge number signifies a thicker wire, while a higher gauge number indicates a thinner wire. Thicker wires can carry more current without overheating. This characteristic enhances safety by reducing the risk of electrical fires.
Thicker wire also offers lower resistance. Low resistance minimizes energy loss in the form of heat. This feature improves performance by ensuring efficient electricity flow. Conversely, using a wire that is too thin can result in excessive heat buildup. Overheating can damage insulation and other electrical components.
Selecting the appropriate wire gauge depends on the application’s current requirements. Manufacturers provide guidelines for different wire gauges. Following these recommendations increases safety and optimizes performance.
Inconsistent wire gauge use can lead to voltage drops. A significant voltage drop affects the proper functioning of devices. This change can cause flickering lights or slower performance in appliances. Overall, proper wire gauge selection is crucial for both safety and reliable electrical system operation.
What Types of Wire Are Recommended for Chandelier Rewiring?
The best types of wire for rewiring a chandelier are typically copper wire and aluminum wire.
- Copper wire
- Aluminum wire
- 12-gauge wire
- 14-gauge wire
- 16-gauge wire
When considering chandelier rewiring, it is essential to understand the characteristics and applications of each wire type.
-
Copper Wire: Copper wire is a popular choice due to its excellent conductivity. This wire type allows electricity to flow efficiently, reducing the risk of overheating. According to the National Electrical Code (NEC), copper wire is often preferred in residential wiring because of its durability and high tensile strength. Copper wire is also resistant to corrosion, which is essential for fixtures that may be in humid environments.
-
Aluminum Wire: Aluminum wire is lighter and generally less expensive than copper wire. However, it has lower conductivity and may require larger gauge sizes to carry the same current as copper. The NEC states that aluminum wire can oxidize, leading to poor electrical connections. This makes it less ideal for chandeliers that may be frequently accessed or altered.
-
12-gauge Wire: A 12-gauge wire is suitable for heavy chandeliers that require higher electrical loads. This gauge can handle a maximum current of 20 amps, making it appropriate for larger fixtures. The American Wire Gauge (AWG) standard specifies this size for significant lighting installations.
-
14-gauge Wire: Fourteen-gauge wire is often used for medium-sized chandeliers that do not require as much current. It can handle up to 15 amps, providing a safe and reliable option for standard lighting needs. The flexibility of 14-gauge wire also makes it easier to work with during installation.
-
16-gauge Wire: A 16-gauge wire is typically reserved for smaller chandeliers or accent lighting. It can handle a maximum of 10 amps, ideal for fixtures with lower electrical demands. This type also works well in intricate designs that may require more delicate wiring.
When rewiring a chandelier, it is crucial to consider the electrical load, gauge size, and wire material to ensure safety and functionality.
What Are the Pros and Cons of Solid and Stranded Wire for Chandeliers?
Solid Wire Pros:
- Better conductivity due to fewer connections.
- Less prone to breakage under tension.
- More durable and long-lasting.
Solid Wire Cons:
- Less flexible, making installation in tight spaces difficult.
- Can be harder to route through fixtures.
Stranded Wire Pros:
- More flexible, allowing for easier installation in complex shapes.
- Better suited for fixtures that require movement or vibration.
Stranded Wire Cons:
- More connections can lead to reduced conductivity.
- More prone to fraying and breakage over time.
| Type | Pros | Cons |
|---|---|---|
| Solid Wire | Better conductivity, less prone to breakage, durable | Less flexible, harder to route |
| Stranded Wire | More flexible, suited for movement | Reduced conductivity, prone to fraying |
| Solid Wire | More long-lasting | |
| Stranded Wire | More prone to breakage over time |
How Important Is Insulation in Chandelier Wiring Choices?
Insulation plays a crucial role in chandelier wiring choices. It protects electrical wires from short circuits and environmental factors. Good insulation prevents electrical shock, fire hazards, and damage to the chandelier.
First, identify wire insulation types. Common types include PVC (polyvinyl chloride) and rubber. PVC is cost-effective and suitable for most indoor applications. Rubber offers superior flexibility and heat resistance.
Next, consider the chandelier’s location. Indoor chandeliers often require standard insulation. Outdoor fixtures need weather-resistant insulation to withstand moisture and temperature changes.
Then, evaluate the voltage of the chandelier. Higher voltage fixtures require thicker insulation. This ensures they handle the electrical load without risk.
Also, observe local electrical codes. Compliance with these regulations ensures safety and proper insulation use.
Finally, choose wires with adequate insulation ratings. This includes checking for UL (Underwriters Laboratories) certification. UL certification guarantees quality and safety.
In summary, insulation is vital for safety, code compliance, and optimal performance in chandelier wiring. It protects against risks associated with electrical currents, thus ensuring a safe and functional lighting installation.
What Steps Should Be Followed to Safely Rewire a Chandelier?
To safely rewire a chandelier, follow these essential steps: turn off the power, remove the chandelier, identify and disconnect wires, install the new wiring, and reassemble the chandelier.
- Turn off the power at the circuit breaker.
- Remove the chandelier carefully.
- Identify and disconnect the existing wires.
- Install the new wiring.
- Reassemble the chandelier.
These steps provide a clear roadmap for the rewiring process. Exploring the specifics of safely rewiring a chandelier reveals important considerations.
-
Turn Off the Power: Turning off the power involves switching off the circuit breaker supplying electricity to the chandelier. This step prevents electrical shock and ensures safety. Use a voltage tester to confirm the power is off.
-
Remove the Chandelier: Removing the chandelier requires detaching it from the ceiling fixture. This usually involves unscrewing nuts or bolts that secure the chandelier. It’s crucial to support the chandelier during this process to prevent it from falling.
-
Identify and Disconnect Wires: Identifying and disconnecting wires involves examining the existing connections. Typically, you will find black (hot), white (neutral), and green or bare (ground) wires. Document or label the configuration for reference when installing new wiring. Carefully disconnect each wire from the fixture.
-
Install the New Wiring: Installing new wiring includes connecting the new wires to the chandelier. Match the wires according to the previous configuration: connect black to black, white to white, and green or bare to ground. Use wire connectors to secure the connections, and wrap electrical tape around them for extra safety.
-
Reassemble the Chandelier: Reassembling the chandelier entails placing it back in its original position and securing it to the ceiling fixture. Ensure all screws and bolts are tight. Finally, restore power at the circuit breaker and test the chandelier to confirm proper operation.
What Safety Precautions Must Be Taken When Rewiring a Chandelier?
When rewiring a chandelier, it is essential to take specific safety precautions.
- Turn off the power supply.
- Use insulated tools.
- Wear safety goggles.
- Check for frayed wires.
- Avoid working on wet surfaces.
- Take note of weight and suspension.
- Seek professional help if uncertain.
- Use the correct gauge wire.
- Maintain proper grounding.
- Follow local electrical codes.
Ensuring safety is paramount to avoid accidents. The following sections provide detailed explanations of the necessary precautions.
-
Turn Off the Power Supply: Turning off the power supply involves cutting electricity to the chandelier before starting any work. This step eliminates the risk of electric shock. Homeowners can do this by switching off the corresponding circuit breaker in the electrical panel. An estimated 30,000 emergency room visits occur each year in the U.S. due to electrical injuries, underscoring the importance of this step.
-
Use Insulated Tools: Using insulated tools means choosing tools that have non-conductive handles. This precaution helps prevent electric shocks during the rewiring process. Tools such as screwdrivers, pliers, and wire cutters should meet safety standards as outlined by the American National Standards Institute (ANSI).
-
Wear Safety Goggles: Wearing safety goggles protects the eyes from potential debris and glass shards. When handling chandeliers, particularly older models, small pieces can break off due to age or technical issues. According to the American Academy of Ophthalmology, protective eyewear can prevent 90% of eye injuries in accidents.
-
Check for Frayed Wires: Checking for frayed wires involves inspecting the existing wires before changing them. This step identifies any wear or damage that could lead to short circuits or fires. The National Fire Protection Association (NFPA) reports that faulty wiring contributes to approximately 45,000 home fires annually.
-
Avoid Working on Wet Surfaces: Avoiding wet surfaces means ensuring the work area is dry before beginning any electrical tasks. Water is a conductor of electricity, and wet conditions increase the risk of electric shock. The National Institute for Occupational Safety and Health (NIOSH) emphasizes the importance of maintaining dry work conditions in electrical work.
-
Take Note of Weight and Suspension: Taking note of weight and suspension ensures the chandelier is adequately supported during installation. Heavy chandeliers require specific mounting fixtures, which can typically hold at least four times the chandelier’s weight. Improper supports can lead to accidents and injuries from falling fixtures.
-
Seek Professional Help If Uncertain: Seeking professional help means hiring a qualified electrician for those who are inexperienced in electrical work. This precaution assures that all wiring conforms to safety standards and local electrical codes to prevent hazards. The U.S. Bureau of Labor Statistics shows that electricians are trained to handle risks involved in electrical installations.
-
Use the Correct Gauge Wire: Using the correct gauge wire is essential for handling the chandelier’s electrical load. This entails knowing the chandelier’s wattage and using wiring that can safely carry that load. The National Electrical Code (NEC) specifies that the wire gauge should be suitable to prevent overheating and possible fires.
-
Maintain Proper Grounding: Maintaining proper grounding connects electrical installations to the ground with a wire. This safety measure ensures that faults lead to the safe discharge of electricity, reducing shock hazards. The NEC requires all fixtures to have adequate grounding in residential installations.
-
Follow Local Electrical Codes: Following local electrical codes means adhering to guidelines that vary by region. These codes ensure that electrical work meets safety standards and regulations set forth by local governments. The International Code Council (ICC) provides model codes that secure safety in electrical wiring.
By adhering to these safety precautions, the rewiring of a chandelier can be conducted safely and effectively.
What Common Mistakes Should Be Avoided When Choosing Wire for a Chandelier?
When choosing wire for a chandelier, several common mistakes should be avoided to ensure safety and functionality.
- Using incorrect wire gauge
- Ignoring wire insulation type
- Overlooking voltage ratings
- Not considering wire length
- Failing to account for wire color coding
These mistakes can lead to electrical failures, safety hazards, and inefficient chandelier performance. Understanding these factors is crucial for a successful installation.
-
Using Incorrect Wire Gauge:
Using incorrect wire gauge can create safety issues. The wire gauge refers to the thickness of the wire. A wire that is too thin (higher gauge number) may not carry the electrical load safely. This can lead to overheating or fire hazards. For chandeliers, it is generally recommended to use 14 or 12-gauge wire, depending on the wattage. -
Ignoring Wire Insulation Type:
Ignoring wire insulation type can result in exposure of the wire to environmental factors. Insulation protects the wire from heat and moisture that can cause damage. For indoor use, options like PVC or THHN (Thermoplastic High Heat-Resistant Nylon-coated) are common. Outdoor installations require more robust insulation to withstand weather conditions. -
Overlooking Voltage Ratings:
Overlooking voltage ratings can lead to electrical malfunctions. Each wire has a maximum voltage it can safely handle. Most chandeliers operate on 120 volts, so choosing wire rated for this voltage is essential to prevent short-circuits or equipment failure. -
Not Considering Wire Length:
Not considering wire length can cause electrical inefficiencies. Longer wire runs may result in voltage drop, affecting the chandelier’s brightness. It’s important to calculate the required length and account for any excess needed for connections when installing. -
Failing to Account for Wire Color Coding:
Failing to account for wire color coding may lead to incorrect wiring. Different colors indicate specific functions: for instance, black or red is usually hot, white is neutral, and green is ground. Following these conventions ensures correct connections and enhances safety.